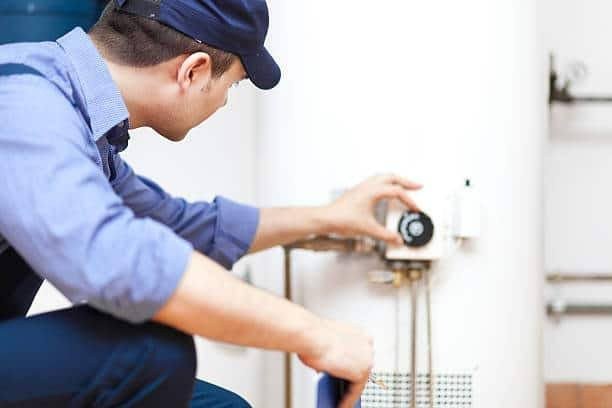
A water heater that fails without warning dumps 40 to 80 gallons of water into your basement, garage, or utility closet. The replacement cost runs $800 to $2,500 installed. A water heater that receives basic maintenance lasts 10 to 15 years instead of 6 to 8. The maintenance itself costs under $50 per year in materials and takes less than an hour annually. The math is the simplest return on investment in home maintenance.
Most water heaters are ignored until the shower goes cold or the puddle appears on the floor. The checklist below is not aspirational. It is the minimum viable maintenance that prevents the two most common failure modes: sediment buildup that insulates the tank bottom from the burner and causes the steel to overheat and crack, and anode rod depletion that allows the tank wall itself to corrode. If you do nothing else, drain sediment once a year and check the anode rod every two years. Everything else on this list flows from those two tasks.
Why Water Heater Maintenance Actually Pays for Itself
A standard tank water heater with zero maintenance might last 8 years. The same unit with annual sediment flushing and anode rod replacement every 3 to 5 years routinely reaches 12 to 15 years. That is 4 to 7 extra years of service from a $50 annual investment in time and materials. The Department of Energy notes that sediment buildup of just half an inch on the bottom of a gas water heater tank can reduce heating efficiency by up to 25%, directly increasing monthly utility bills.
The cost breakdown makes the case by itself. Replacing a water heater runs $800 to $2,500 for a standard tank unit and $2,500 to $5,000 for a tankless model, not including any water damage from the failed unit. Annual maintenance materials — a replacement anode rod ($20 to $40), a garden hose you already own, and maybe a $10 T&P relief valve if the old one fails the test — total under $75. The energy savings from a clean, efficient tank add another $50 to $100 per year in reduced gas or electric bills. Maintenance does not cost money. Neglecting maintenance costs money.
According to ENERGY STAR, water heaters account for roughly 18% of a typical home’s energy use, making them the second-largest energy consumer after heating and cooling. A well-maintained unit operates closer to its rated efficiency. A neglected unit operates progressively worse until it fails entirely.
Monthly Water Heater Maintenance — 5 Visual Checks Under 10 Minutes
Monthly maintenance on a water heater takes under ten minutes and requires no tools beyond a flashlight. These checks catch developing problems before they become emergencies. Set a recurring calendar reminder on the first of each month.
1. Visual inspection of the tank and connections. Shine a flashlight around the base of the tank, the inlet and outlet pipes on top, and the fittings. Look for any sign of moisture, rust, or white mineral deposits at pipe joints. A tiny drip at a fitting that is caught early needs a $2 pipe tape fix. The same drip ignored for six months corrodes the fitting and requires a plumber to cut and replace the pipe section.
2. Check the area around the pressure relief valve discharge pipe. The T&P valve has a pipe running down toward the floor. If there is water in that pipe or a damp spot on the floor beneath it, the valve is either leaking (replace it, $15 to $25) or the tank pressure is too high (install a pressure reducing valve on the main line, $50 to $150). Do not cap or plug a leaking T&P valve. It is the sole safety mechanism preventing the tank from becoming a bomb if the thermostat fails.
3. Listen for unusual sounds. A water heater that pops, cracks, or rumbles during the heating cycle has sediment buildup on the tank bottom. The sound is water trapped under the sediment layer boiling and exploding upward. That sediment is insulating the tank bottom from the water, causing the steel to overheat. If you hear these sounds, move the annual tank flush to this weekend instead of waiting.
4. Verify the temperature setting. The dial on a gas water heater or the thermostat on an electric unit should read 120 degrees Fahrenheit. Higher than 120 wastes energy and creates a scalding risk. Lower than 120 risks bacterial growth, specifically Legionella which thrives in water between 77 and 113 degrees. If the temperature drifts from the set point, the thermostat may be failing.
5. Clear the area around the water heater. Remove anything stored within 18 inches of the unit — paint cans, boxes, holiday decorations, lawn chemicals. Gas water heaters need airflow for combustion. Flammable materials near the pilot light or burner are a fire hazard. This check takes 30 seconds and prevents the kind of accident that makes the evening news.
Annual Water Heater Maintenance — The Tasks That Prevent Failure
The annual maintenance session takes roughly one to two hours and requires basic tools: a garden hose, a flathead screwdriver, and for anode rod replacement, a 1-1/16-inch socket and breaker bar. Schedule this on a weekend morning when you can live without hot water for a couple of hours.
1. Drain and flush the tank. Connect a garden hose to the drain valve at the bottom of the tank. Run the hose to a floor drain, outside to the driveway, or into a bucket if neither option is available. For gas water heaters, set the control to pilot. For electric water heaters, turn off the breaker. Close the cold water supply valve on top of the tank. Open a hot water faucet in a nearby sink to relieve vacuum pressure. Open the drain valve and let the tank empty, this will take 20 to 40 minutes depending on sediment buildup. After the tank is empty, briefly open the cold water supply valve for 10 seconds to stir up remaining sediment at the bottom, then drain again. Repeat until the water runs clear. Close the drain valve, open the cold supply, and let the tank refill while the hot water faucet remains open to bleed air. Once water flows steadily from the faucet instead of sputtering air, close the faucet. For electric units, make absolutely sure the tank is full before restoring power, a dry-fired heating element burns out in under a minute. Restore gas or power.
2. Test the temperature and pressure relief valve. Place a bucket under the T&P valve discharge pipe. Quickly lift and release the valve’s test lever. Water should rush out forcefully and stop completely when the lever is released. If the valve does not release water, or if it drips continuously afterward, replace it. A T&P valve costs $15 to $25 and threads out with a pipe wrench after draining a few gallons from the tank to lower the water level below the valve. This test takes 30 seconds. Most homeowners skip it for years. A seized T&P valve is a missile waiting for the wrong thermostat failure.
3. Check and replace the anode rod. The anode rod is a magnesium or aluminum rod threaded into the top of the tank. It corrodes sacrificially so the steel tank wall does not. When the rod is more than 50% depleted or covered in calcium, replace it. Check it every 2 to 3 years. If you have a water softener, check it annually, softened water accelerates anode rod consumption. Turn off the cold water supply and relieve pressure by opening a hot water faucet. Use a 1-1/16-inch socket and a breaker bar to unscrew the rod. If overhead clearance is tight, water heaters in closets or under stairs, buy a flexible segmented anode rod that bends as you insert it. A replacement rod costs $20 to $40. A new water heater tank because nobody checked the rod costs $800 and up.
4. Inspect the burner assembly and venting (gas models). Remove the access panel at the bottom of the tank. Check the burner flame through the sight glass, it should be blue and steady. A yellow or flickering flame indicates incomplete combustion and poor venting, which produces carbon monoxide. Vacuum any dust or debris from the burner compartment with a shop vac. Inspect the flue vent pipe running from the top of the tank to the chimney or wall outlet. Look for rust, gaps at the joints, or disconnected sections. A disconnected flue pipe sends carbon monoxide into the room instead of outside. Secure any loose joints with sheet metal screws and foil tape rated for high temperature.
5. Flush a quart of water from the tank (for those who skip the full drain). If the full tank drain described in step 1 is not feasible, no floor drain, no outdoor hose access, sub-zero temperatures outside, at minimum drain 1 to 2 quarts into a bucket. This removes loose sediment at the drain valve level and confirms the valve itself is not seized. A drain valve that will not open is a serious problem when the tank eventually needs replacement and must be emptied.
| Task | Frequency | Time | Cost | Risk If Skipped |
| Visual inspection | Monthly | 5 min | $0 | Undetected leak, water damage |
| T&P valve test | Annually | 1 min | $0–$25 | Tank explosion risk |
| Tank drain & flush | Annually | 45–90 min | $0 | Sediment cracks tank bottom |
| Anode rod check | Every 2–3 years | 15 min | $20–$40 | Tank wall corrosion, leak |
| Burner/vent inspection | Annually | 15 min | $0 | CO poisoning, fire hazard |
| Temperature verify | Monthly | 1 min | $0 | Scalding or bacteria risk |
Tankless Water Heater Maintenance, A Different Routine
Tankless water heaters have no tank to drain and no anode rod to replace, so the maintenance checklist changes entirely. Instead of sediment accumulation, the primary failure mode on a tankless unit is mineral scale, calcium and magnesium deposits that build up inside the heat exchanger and reduce its ability to transfer heat to the water. A scaled heat exchanger works harder, runs hotter, and fails earlier. The maintenance involves flushing the unit with a descaling solution, typically white vinegar or a commercial descaler, circulated through the heat exchanger with a small pump.
The process takes about 45 minutes and should be done annually in hard-water areas, every 18 to 24 months in soft-water areas. You need a submersible pump ($50 to $80), two washing machine hoses, a 5-gallon bucket, and 3 to 4 gallons of food-grade white vinegar. Turn off the power and gas to the unit. Close the isolation valves on the inlet and outlet. Connect the hoses to the service ports on the valves. Place the pump in the bucket filled with vinegar, connect the cold-side hose to the pump output, and run the hot-side hose back into the bucket to create a circulation loop. Run the pump for 45 minutes, then flush the system with clean water for 5 minutes before reconnecting everything and restoring power.
In addition to descaling, clean the inlet water filter, a small screen inside the cold water inlet that catches debris. A clogged filter reduces flow rate and triggers the unit’s low-flow safety shutdown. Check and clean the air intake filter on gas tankless units, which prevents dust and lint from restricting combustion air. Both filters are tool-free and take under two minutes to check.
Gas vs. Electric Water Heaters, Where Maintenance Differs
Gas and electric water heaters share the same core maintenance tasks, draining, anode rod, T&P valve, but each type has specific failure points that the other does not.
Gas water heater specific tasks: Inspect the burner flame monthly through the sight glass (blue = good, yellow = venting problem). Check the flue vent pipe for rust, gaps, and blockages annually, birds and rodents sometimes nest in the exhaust outlet. Test the thermocouple if the pilot light keeps going out, a failing thermocouple costs $10 to $20 and takes 15 minutes to replace. Keep the area around the burner compartment free of dust and lint, which can restrict combustion air and cause sooting. Carbon monoxide detectors in the same room as a gas water heater are not optional.
Electric water heater specific tasks: Check the heating elements for continuity with a multimeter every 2 to 3 years, a burned-out element is the most common cause of no hot water in electric units. Inspect the wiring connections at the thermostat and element terminals for signs of overheating (discolored wire insulation, melted plastic). Tighten any loose terminal screws. If the water has a sulfur or rotten-egg smell that persists after flushing, the anode rod is reacting with sulfates in the water, switching from a magnesium rod to an aluminum-zinc rod usually solves the odor without sacrificing corrosion protection.
Signs Your Water Heater Needs Immediate Attention
Water heaters rarely fail without warning. They send signals for weeks or months before the catastrophic event. Recognizing these signals and acting on them prevents emergency replacement calls and water damage.
Rusty or discolored hot water from all faucets. If only the hot water is rusty and the cold runs clear, the tank interior is corroding. This is the anode rod’s failure signal. Replace the rod immediately. If the rod is gone and the tank itself is rusting, replacement is the only option, a rusting tank can develop a pinhole leak at any moment.
Water pooling around the base of the tank. A leak at the tank base is almost never a repairable fitting problem. It is the tank itself failing. Shut off the cold water supply and the power or gas immediately. Drain the tank to prevent more water from leaking. Call a plumber for replacement. Do not try to patch a leaking tank. The leak is internal corrosion that has breached the steel, the surrounding metal is equally thin and will fail next.
Rumbling, popping, or banging during heating cycles. Sediment buildup has reached the point where it is insulating the tank bottom from the water. The steel is overheating and will eventually crack. A full drain and flush may resolve the noise. If the noise persists after flushing, the sediment has hardened into a cement-like layer that requires professional descaling or tank replacement.
Hot water runs out faster than it used to. If a 50-gallon tank that used to provide two consecutive showers now runs cold halfway through the first one, the lower heating element on an electric unit has likely failed, or the dip tube on a gas unit has broken off. The dip tube directs cold incoming water to the bottom of the tank to be heated. A broken dip tube dumps cold water at the top, where it mixes with the hot water being drawn out. Replacing a dip tube costs $10 to $20 and takes 20 minutes. A heating element costs $15 to $30.
Frequently Asked Questions
How often should I drain my water heater?
Once per year for most households. Homes with hard water (high mineral content) should drain and flush every 6 months. If your water heater is more than 5 years old and has never been drained, the drain valve may be clogged with sediment and unable to open. In that case, do not force it, call a plumber for the first flush or replace the drain valve entirely. A stuck-open drain valve that cannot be closed means the tank cannot be refilled, and you have no hot water until a plumber arrives.
Can I do water heater maintenance myself, or do I need a plumber?
Monthly visual checks and temperature verification require no skill. The annual drain and flush is a DIY task for anyone comfortable connecting a garden hose and operating a valve. Anode rod replacement requires moderate strength, the rod is torqued tight from the factory and often needs a breaker bar to break loose. If you cannot break the rod free, call a plumber. T&P valve replacement is straightforward DIY. Burner and vent inspection on gas units is DIY if you are comfortable removing an access panel, but if you smell gas at any point, stop and call a professional. Professional water heater maintenance service calls typically run $100 to $200 for the full annual checklist, which is still far cheaper than premature replacement.
Does a tankless water heater need less maintenance?
No. Tankless units require different maintenance, not less. The annual descaling flush is mandatory in hard-water areas and takes roughly the same time as draining a tank. The consequences of skipping maintenance are worse on a tankless unit, a scaled heat exchanger cannot be cleaned once the scale hardens, and replacement of the heat exchanger costs $500 to $1,500, often approaching the price of a new unit. The inlet water filter and air intake filter need checking every 6 months, a task that takes under 5 minutes.
What is the average lifespan of a water heater with proper maintenance?
A standard tank water heater with annual maintenance typically lasts 10 to 15 years. Tankless units with annual descaling routinely last 20 years or more. Without maintenance, tank units often fail between years 6 and 9, and tankless heat exchangers can fail in 8 to 10 years from scale buildup. The single highest-impact maintenance task for tank longevity is anode rod replacement. The single highest-impact task for tankless longevity is annual descaling.
Which anode rod material is best, magnesium, aluminum, or powered?
Magnesium rods are the standard recommendation for most households and provide the best corrosion protection. If your water has a sulfur smell (rotten eggs), switch to an aluminum-zinc rod, which reduces the chemical reaction that produces hydrogen sulfide gas. Powered anode rods, which use a small electrical current instead of sacrificial metal, never need replacement and eliminate odor issues entirely, but they cost $80 to $150 versus $20 to $40 for a standard rod and require a nearby electrical outlet. For most homeowners, a magnesium rod replaced every 3 years is the practical answer.