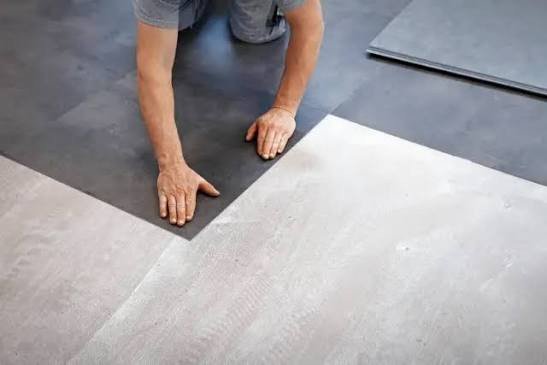
Kitchen flooring takes more abuse than any floor in the house except maybe the entryway. Spills, dropped pans, chair legs scraping back and forth, and foot traffic from the busiest room in the home all land on the same surface every day. Replacing a kitchen floor costs $1,500 to $4,500 on average for a 200-square-foot kitchen. Choosing a budget-friendly material that holds up cuts that number to $400 to $1,000 for the same space — and several of the materials listed below can be installed by a homeowner over a weekend, eliminating the $3 to $8 per square foot labor cost entirely.
The floor a kitchen needs is not the floor most kitchens get. Hardwood looks beautiful for about six months before the first dishwasher leak, dropped ice cube, or spilled pot of pasta water leaves a permanent mark. The best budget kitchen flooring is waterproof or highly water-resistant, easy to clean, and forgiving of the impact and abrasion that a kitchen dishes out daily. The seven options below each hit a different balance of price, durability, and appearance. The right one for your kitchen depends on which of those three you are least willing to compromise.
Luxury Vinyl Plank (LVP) — The Best All-Around Budget Choice
Luxury vinyl plank is the current default answer for budget kitchen flooring for a reason. It costs $2 to $5 per square foot for the material, installs as a floating floor with click-lock edges that require no glue and no nails, and the better products are 100% waterproof — not water-resistant, waterproof. A dropped pot of boiling water, an ice cube that melts under the refrigerator, a dishwasher leak that goes unnoticed for hours: none of it damages LVP. The top wear layer, measured in mils (thousandths of an inch), determines durability. A 12-mil wear layer handles residential kitchens. A 20-mil wear layer handles kitchens with large dogs. The printed design layer underneath mimics wood, stone, or tile with enough fidelity that visitors tap it with their shoe to check whether it is real.
LVP has two limitations worth knowing. First, it requires a flat subfloor. Any dip or bump in the substrate telegraphs through the vinyl within months, creating a visible ridge or soft spot. Floor leveling compound adds $30 to $50 per bag and an afternoon of work before laying the planks. Second, LVP expands and contracts with temperature changes. Leave a 1/4-inch gap around the perimeter for expansion and cover it with baseboard or quarter-round molding. Skip the gap and the floor will buckle at the seams on the first hot day.
Luxury Vinyl Tile (LVT) — The Same Material, Different Look
Luxury vinyl tile is LVP cut into square or large-format tile shapes instead of planks. It costs the same $2 to $5 per square foot and installs the same way. The advantage is aesthetic. LVT in a 12-by-24-inch format with stone-look printing reads as tile from standing height. It also allows groutable edges — some LVT products have a beveled edge designed to accept a thin grout line, which completes the tile illusion. The grout is acrylic and flexible, so it moves with the floor rather than cracking like cement-based grout on a floating surface. The disadvantage versus plank LVP is simply that the tile format produces more seams per square foot, and seams are where water eventually finds a path through if the click-lock system was not fully engaged during installation.
Laminate Flooring, The Wood Look at Half the Price
Laminate costs $1 to $3 per square foot and looks more convincingly like real wood than LVP does because the top layer is a high-resolution photograph of wood under a clear wear layer, not a printed pattern. The downside is that laminate is water-resistant, not waterproof. Standing water that sits on laminate for more than a few hours seeps into the joints, swells the fiberboard core, and ruins the plank. In a kitchen, that means the area in front of the sink, dishwasher, and refrigerator are high-risk zones. A mat in front of the sink helps but does not solve the problem of a leak you do not see until the floor is already damaged.
Laminate is the right budget choice for a kitchen where water exposure is controlled, no kids filling cups at the sink, no pets with water bowls on the floor, no dishwasher that has leaked before. It is the wrong choice for a busy family kitchen where spills are a daily event. The price advantage over LVP is roughly $1 to $2 per square foot, or $200 to $400 on a 200-square-foot kitchen. Whether that saving is worth the water vulnerability depends on your household.
Ceramic and Porcelain Tile, Cheap to Buy, Expensive to Install
Ceramic tile starts at $1 to $3 per square foot. Porcelain, which is denser and more durable, starts at $2 to $5 per square foot. Both are completely waterproof and nearly indestructible. The catch is installation. Tile requires a perfectly flat, rigid subfloor. In many kitchens, that means installing cement backer board over the subfloor before tiling, which adds $1 to $2 per square foot in materials and a full day of labor. Professional tile installation costs $5 to $10 per square foot, which turns a $400 material purchase into a $1,500 to $2,500 installed floor for a 200-square-foot kitchen. DIY tile installation is learnable, the tools cost $100 to $200 and the skill is patience, not talent, but it is the most labor-intensive flooring option by a wide margin. Tile is the right budget choice only if you do the labor yourself.
Grout is tile’s other weakness. Cement-based grout stains, absorbs water, and collects dirt. In a kitchen, grout lines become darker than the tile within a year unless sealed annually. Epoxy grout solves the staining problem but costs more and is harder to work with. A larger tile format, 12 by 24 inches instead of 12 by 12, reduces the total linear feet of grout lines by roughly half, which means half the cleaning and sealing. Porcelain tile in a matte or textured finish also provides better slip resistance than glossy ceramic, which matters in a kitchen where the floor gets wet.
Sheet Vinyl, The Cheapest Option That Still Looks Intentional
Sheet vinyl costs $1 to $2 per square foot and comes in 12-foot-wide rolls, which means a standard kitchen can be covered with a single seam or no seams at all. No seams means no place for water to get under the floor. Sheet vinyl is fully waterproof when installed correctly with adhesive across the entire surface and seams sealed at the edges. The print quality on modern sheet vinyl is dramatically better than the yellowed floral patterns of the 1970s, current products mimic wood plank, stone tile, and even concrete convincingly.
The limitation is subfloor preparation. Sheet vinyl telegraphs every imperfection in the substrate. A staple head, a seam in the plywood, a low spot in the floor leveling compound, all of it shows through the vinyl within weeks. The subfloor must be smooth to the touch before installation. For kitchens with a beat-up subfloor, LVP plank is more forgiving because the rigid plank core bridges small imperfections that sheet vinyl cannot.
| Material | Cost/sq ft | Waterproof | DIY Difficulty | Best For |
| LVP (Luxury Vinyl Plank) | $2–$5 | Yes | Easy | Best all-around |
| LVT (Luxury Vinyl Tile) | $2–$5 | Yes | Easy | Stone/tile look |
| Laminate | $1–$3 | No | Easy | Dry kitchens |
| Ceramic Tile | $1–$3 | Yes | Hard | DIYers with time |
| Porcelain Tile | $2–$5 | Yes | Hard | DIYers with time |
| Sheet Vinyl | $1–$2 | Yes | Moderate | Tightest budget |
| Peel-and-Stick Vinyl | $0.50–$1.50 | Water-resistant | Very Easy | Temporary solution |
Peel-and-Stick Vinyl Tile, The Weekend Solution With a Short Lifespan
Peel-and-stick vinyl tiles cost $0.50 to $1.50 per square foot and install in an afternoon. Each tile has adhesive backing that sticks directly to the existing floor or subfloor. No underlayment, no clicking together, no cutting beyond a utility knife for edge tiles. The result looks acceptable from standing height for about 2 to 3 years in a kitchen. After that, the edges start to lift, the tiles shift slightly underfoot, and the seams collect dirt that cannot be cleaned out. Peel-and-stick is the right answer when the floor is currently unacceptable, cracked linoleum from 1985, bare plywood, or painted concrete, and you need it to look presentable for under $300 total before a dinner party next weekend. It is a bridge to a permanent floor, not the permanent floor itself.
According to ENERGY STAR, pairing a kitchen flooring upgrade with energy-efficient appliance replacements can reduce the room’s overall energy consumption by 15% to 30%, a consideration worth factoring into the total renovation budget since the appliances and the floor share the same timeline in most remodels.
What to Avoid in a Kitchen, and Why
Three flooring materials show up in kitchen design photos constantly and make sense in almost no real kitchen. Hardwood warps from water exposure, stains from food spills, and scratches from chair legs. The only kitchen where hardwood works is one where nobody cooks. Engineered hardwood has a plywood base that resists warping better than solid wood, but the top veneer is still real wood that stains and scratches. Bamboo flooring is marketed as eco-friendly and durable, and it is, in dry spaces. In a kitchen, bamboo’s sensitivity to humidity causes it to cup and gap at the seams within a year or two in most climates. Cork flooring is soft underfoot and naturally antimicrobial, but it stains permanently from tomato sauce, wine, oil, and turmeric, basically everything that makes cooking worth doing. If you cook regularly, the three materials above will look worn within 18 months regardless of how carefully you maintain them.
Installation Tips That Save You From Redoing the Floor Next Year
Let the flooring acclimate in the kitchen for 48 hours before installation. Open the boxes and spread the planks or tiles across the floor. This lets the material adjust to the room’s temperature and humidity before you lock it into place. Skipping acclimation causes LVP and laminate to expand after installation and buckle at the seams.
Check the subfloor for flatness with a 6-foot level. Any gap larger than 3/16 inch under the level needs filling with floor leveling compound or sanding down if it is a high spot. This step takes an hour and costs $30 in materials. Skipping it causes the new floor to flex, squeak, and eventually fail at the joints.
Remove the baseboards before installation and reinstall them afterward on top of the new floor. The alternative, leaving baseboards in place and covering the expansion gap with quarter-round molding, works functionally but looks like a cover-up because it is one. Baseboard removal takes 15 minutes with a pry bar and a putty knife to protect the wall, and the result is a clean, professional edge that quarter-round cannot match.
For any floating floor, LVP, LVT, or laminate, use an underlayment if the product does not have an attached pad. Underlayment costs $0.30 to $0.60 per square foot and provides sound deadening, minor subfloor imperfection bridging, and thermal insulation. On a concrete slab, a vapor barrier underlayment is not optional. Concrete emits moisture vapor continuously, and without a barrier, that moisture condenses under the planks and causes mold and swelling. A 6-mil polyethylene sheet under the underlayment or an underlayment with a built-in vapor barrier solves this for about $50 in a 200-square-foot kitchen.
Frequently Asked Questions
What is the best waterproof kitchen flooring on a tight budget?
Sheet vinyl at $1 to $2 per square foot is the most waterproof option at the lowest cost. Installed correctly with full-spread adhesive, it creates a continuous waterproof membrane with no seams for water to penetrate. The trade-off is appearance, sheet vinyl looks like what it costs. For $1 to $3 more per square foot, LVP delivers the same waterproof performance with a more convincing wood or stone appearance and the ability to replace individual damaged planks without redoing the entire floor.
LVP vs. laminate, which is better for a kitchen?
LVP is better for kitchens. Both materials cost roughly the same at the budget tier ($2 to $4 per square foot) and install similarly as floating floors. The deciding difference is water resistance. LVP is waterproof. Laminate is water-resistant but swells and delaminates if water sits on it for more than a few hours. In a kitchen, where the refrigerator ice maker line, the dishwasher, and the sink all represent potential water sources, LVP eliminates the single most common kitchen flooring failure mode. Choose laminate only if the kitchen is a low-moisture environment and the $1 to $2 per square foot savings over LVP is material to the budget.
Can I install new kitchen flooring over the existing floor?
Yes, with conditions. Floating floors, LVP, LVT, and laminate, can be installed over existing vinyl, tile, or hardwood provided the existing floor is flat, firmly attached, and not cushioned. Carpet must be removed; the padding underneath makes it unsuitable as a substrate. Sheet vinyl with a cushioned backing must be removed or covered with a rigid underlayment. The existing floor height matters too. Adding a new floor on top of an old one raises the finished floor height by 1/4 to 1/2 inch, which can create a trip hazard at doorways and require undercutting door casings and trimming doors. If the existing floor is damaged, uneven, or already built up from a previous overlay, remove it and install the new floor on the subfloor.
What is the absolute cheapest way to replace a kitchen floor?
Peel-and-stick vinyl tile at $0.50 to $1.50 per square foot, installed by you over the existing floor in an afternoon. A 200-square-foot kitchen costs $100 to $300 total. The result will not last more than 2 to 3 years before edges lift and seams collect dirt, but it transforms the appearance of an unacceptable floor immediately for less than the cost of a single professional installation estimate. Plan to replace it with LVP or tile within 3 years. The peel-and-stick serves as a temporary cosmetic layer until the permanent floor is in the budget.
What subfloor preparation does each flooring type require?
LVP and laminate require a flat subfloor, no more than 3/16-inch variation over 6 feet, and an underlayment or vapor barrier over concrete. Tile requires a rigid subfloor with minimal deflection; cement backer board over plywood is the standard preparation. Sheet vinyl requires a perfectly smooth subfloor because every imperfection telegraphs through. Peel-and-stick vinyl requires a clean, dry, smooth surface, existing vinyl or plywood works; bare concrete must be sealed first to prevent moisture from weakening the adhesive. The subfloor work is the part of flooring installation that takes the most time and makes the least visible difference, which is why it is also the part most DIY installers skip and most regret skipping.