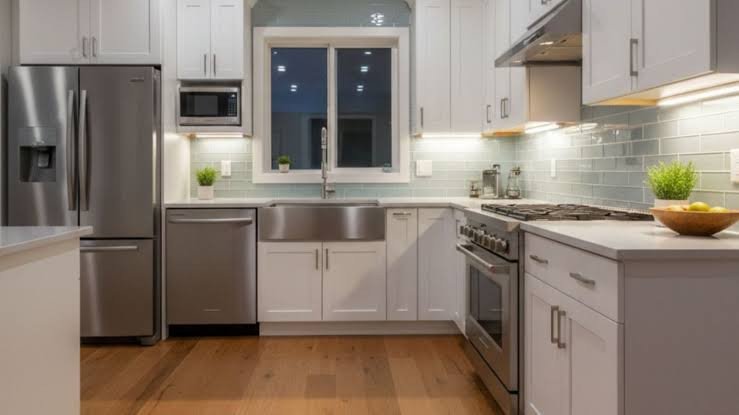
A full kitchen remodel costs $25,000 to $60,000 on average. A budget-friendly kitchen makeover using the strategies below costs $500 to $5,000 and delivers 70% of the visual impact for 10% of the price. The difference is not in the quality of the result. It is in knowing which changes your eye actually registers and which ones cost thousands of dollars that nobody notices.
The psychology of kitchen perception is consistent across buyers, guests, and the person who cooks in it every day. People see paint color before they see cabinet quality. They see hardware finish before they see drawer joint construction. They notice a dated backsplash immediately and a new one immediately, but they cannot tell whether your countertops are quartz or a high-quality laminate without touching them. A budget remodel is the art of investing in what people see and deferring what they do not. This guide organizes the options by what they cost and what they return.
Under $100 — Changes You Can Complete in a Single Afternoon
The lowest-cost kitchen upgrades are also the highest-impact per dollar spent. A $30 can of paint and a $3 brush change the color of an entire wall in two hours. New cabinet hardware for $2 to $8 per piece transforms the look of every cabinet door in the kitchen for under $60 total. These are not compromises. They are the moves that professional designers make first and that homeowners, laser-focused on expensive items like countertops and appliances, consistently overlook.
Paint the walls. A gallon of kitchen-grade paint costs $30 to $50 and covers roughly 350 square feet — enough for two coats on most kitchen walls. The difference between a dingy cream from 2003 and a clean warm white or a deep navy accent wall is the difference between a kitchen that feels like a renovation target and one that feels finished. Use satin or semi-gloss finish in kitchens. Flat paint absorbs cooking grease and cannot be cleaned.
Replace cabinet hardware. Standard cabinet knobs and pulls cost $2 to $8 each. A kitchen with 20 cabinet doors and drawers needs $40 to $160 in hardware. The installation requires a screwdriver and 20 minutes. Choose a finish that contrasts with the cabinet color — matte black on white cabinets, brushed brass on dark cabinets, polished nickel on wood tones. Match the finish across all hardware including light fixtures for a cohesive look.
Install a peel-and-stick backsplash. Peel-and-stick tiles cost $5 to $15 per square foot and install with a utility knife and a straight edge. A standard 30-square-foot backsplash area costs $150 to $450 in materials and installs in an afternoon without grout, without a wet saw, and without any skill beyond measuring and cutting straight lines. The tiles are removable if you change your mind or move out. Real tile installers will tell you peel-and-stick looks fake up close. They are right. It also costs $2,000 less than their quote and from three feet away, nobody can tell the difference.
Replace the faucet. A new kitchen faucet costs $60 to $200 and installs in under an hour with basic wrenches. A pull-down spray head and a modern finish — matte black, brushed nickel, or stainless — update the sink area more than any other single change under $200. Turn off the water supply valves under the sink before starting. If the valves are seized and will not turn, that is a separate plumbing issue that needs attention regardless.
$100–$500, Mid-Range Upgrades That Change the Room’s Character
This tier is where most kitchens go from dated to current without touching the major structural items. The key insight is that paint, not replacement, does most of the work. Cabinets, countertops, and backsplashes can all be refinished for a fraction of replacement cost.
Paint the cabinets. Painting kitchen cabinets is the single most transformative budget remodel option available. The materials cost $100 to $300 for primer, paint, brushes, and rollers. The labor is your weekend. The process: remove doors and hardware, clean thoroughly with a degreaser, sand lightly to scuff the surface, apply a high-bond primer, apply two coats of cabinet-grade paint, let cure for 24 to 48 hours before reinstalling. Use a paint specifically formulated for cabinets, Benjamin Moore Advance, Sherwin-Williams Emerald Urethane, or similar. Standard wall paint will chip within weeks on cabinet surfaces. The result takes a 1990s honey-oak kitchen and turns it into something that looks like it cost $20,000. A kitchen that already has decent cabinet boxes but dated faces is an ideal candidate. A kitchen with water-damaged, delaminating, or structurally failing cabinets needs replacement, not paint.
Refinish countertops with a resurfacing kit. Countertop refinishing kits cost $100 to $300 and cover 35 to 50 square feet. They are essentially thick epoxy paints designed to bond to laminate, tile, or solid surface. The finish options include stone-look, concrete-look, and solid colors. The key to a good result is preparation, the surface must be sanded, cleaned, and absolutely free of grease before application. A refinishing kit gives existing countertops 3 to 5 more years of acceptable appearance. It is not a permanent solution, but it buys time to save for the quartz or granite replacement while the kitchen looks presentable now.
Install open shelving. Removing upper cabinet doors creates open shelving at zero cost. Installing floating shelves on an empty wall costs $20 to $80 per shelf in materials. Open shelving makes a small kitchen feel larger by eliminating the visual weight of upper cabinets. The trade-off is practical: everything on open shelves collects dust and must be kept organized. Reserve open shelving for items you use daily and display items that justify the visibility.
Upgrade light fixtures. A single dated fluorescent box fixture above the sink defines the entire kitchen as old. Replacing it with two or three pendant lights or a modern semi-flush mount costs $50 to $200 per fixture plus $100 to $300 for an electrician to wire new boxes if the existing junction box is not where you want the lights. The lighting upgrade changes how the kitchen photographs and how it feels at night, which is when most dinner parties and family gatherings happen in it.
$500–$2,000, Strategic Investments With the Highest Return
At this price level, the upgrades start to overlap with what a mid-range professional remodel would include, but done selectively and with the labor kept in-house where possible. According to ENERGY STAR, energy-efficient appliances can reduce kitchen energy consumption by 10% to 30% compared to standard models, which means the appliance premium partially pays for itself through lower utility bills over the appliance’s 10- to 15-year lifespan.
Replace appliances selectively. A full appliance suite costs $3,000 to $8,000. Replacing only the most visible or worst-performing appliance costs $500 to $1,500. The refrigerator and the range are what people see. The dishwasher matters only when it is loud enough to interrupt conversation. If your refrigerator is almond-colored from 1992, replacing it with a stainless steel or fingerprint-resistant model modernizes the kitchen instantly. Many retailers offer package discounts on multiple appliances, but if the budget is tight, buy the refrigerator first and the dishwasher when the old one dies. Energy Star certified refrigerators use roughly 15% less energy than standard models and about 40% less than models sold before 2001.
Install butcher block countertops. Butcher block costs $20 to $40 per square foot in materials versus $50 to $100 for quartz or granite. A typical kitchen needs 30 to 40 square feet, putting butcher block at $600 to $1,600 in materials. Installation is DIY-friendly with basic woodworking tools, a circular saw, a drill, and a sander. The surface must be sealed with food-safe mineral oil or a water-based polyurethane. Butcher block scratches and stains more easily than stone. It requires re-oiling every 3 to 6 months. It also looks warm and natural in a way that laminate cannot replicate, and it costs a third of what stone costs.
Add a tile backsplash professionally. The peel-and-stick option under $100 is the budget play. At this tier, real tile installed by a professional tiler costs $10 to $30 per square foot including materials and labor, or $300 to $900 for a standard 30-square-foot area. The difference versus peel-and-stick is durability, cleanability, and the fact that it will never peel at the edges from steam and cooking heat. Subway tile is the cheapest and most timeless option. Running bond pattern, the classic staggered brick look, costs no more than stacked. The labor is what you are paying for, and a good tile job looks perfect at 6 inches.
| Upgrade | Cost Range | DIY? | Visual Impact | ROI at Resale |
| Paint walls | $30–$50 | Yes | High | Moderate |
| Cabinet hardware | $40–$160 | Yes | High | Low |
| Peel-and-stick backsplash | $150–$450 | Yes | High | Low |
| Paint cabinets | $100–$300 | Yes | Very High | High |
| Countertop refinish kit | $100–$300 | Yes | Moderate | Low |
| New light fixtures | $150–$500 | Partial | High | Moderate |
| New refrigerator | $500–$1,500 | No | High | High |
| Butcher block counters | $600–$1,600 | Yes | Very High | High |
| Pro tile backsplash | $300–$900 | No | High | Moderate |
What Not to Touch, When Budget DIY Becomes a False Economy
Some attempts to save money on a kitchen remodel create problems that cost more to fix than hiring a professional would have cost in the first place. The three areas where budget thinking backfires most consistently are plumbing, electrical work inside walls, and structural changes.
Moving the sink changes the plumbing rough-in location. That is not a DIY project. A plumbing mistake inside a wall that leaks slowly for months before anyone notices destroys cabinets, flooring, subfloor, and the ceiling below. The repair cost dwarfs the savings from not hiring a plumber. Moving a gas line for a range is worse, a gas leak kills people. Do not touch gas lines.
Adding outlets or moving electrical boxes inside walls requires cutting into drywall, running new wire, and connecting to the breaker panel. The materials are cheap. The risk of an electrical fire from a loose connection inside a wall is catastrophic. Electrical work inside walls requires a permit and a licensed electrician in most jurisdictions. The outlet you added yourself to plug in the new under-cabinet lighting will be flagged during the home inspection when you sell.
Removing a wall to open the kitchen to the living room is the single most impactful kitchen remodel change and the single worst candidate for budget DIY. Some walls are load-bearing. Removing a load-bearing wall without installing a properly engineered beam causes structural sag that costs tens of thousands of dollars to reverse. Before removing any kitchen wall, pay a structural engineer $300 to $500 to determine whether it is load-bearing and, if so, what size beam is required.
The ROI Math, Which Budget Upgrades Add Value at Resale
Kitchen remodels recover 60% to 80% of their cost at resale on average per industry data. The recovery rate is higher for budget-friendly remodels than for luxury remodels because the buyer pool for a $300,000 house is larger than the buyer pool for a $1.2 million house with a $100,000 kitchen. A $3,000 budget kitchen refresh that makes the space look current and clean may recover 100% or more of its cost by shortening the time on market and avoiding buyer objections about a dated kitchen.
The upgrades that add the most resale value per dollar spent are the ones that show up in listing photos and open-house walkthroughs: painted cabinets, updated hardware, modern light fixtures, and a clean neutral wall color. The upgrades that add the least are the invisible ones: new plumbing inside walls, upgraded electrical panel, insulation. Those matter for function and safety, and you should do them if needed. But they do not sell the house. A buyer who sees a kitchen with freshly painted white cabinets, brushed nickel pulls, and stainless appliances makes an offer. A buyer who sees original 1980s oak cabinets with a brand-new electrical panel behind them asks for a price reduction because the kitchen needs updating. The budget remodel strategy is to fix the visible first and the invisible as maintenance requires.
Frequently Asked Questions
What is the single cheapest change with the biggest impact?
Painting the cabinets. A $150 investment in primer, paint, and supplies transforms a dated kitchen more than any other change under $1,000. The key is surface preparation, cabinets must be cleaned with a degreaser, lightly sanded, and primed before painting. Skipping preparation produces a finish that peels within months. The second-highest impact per dollar is replacing cabinet hardware at under $100 total.
Is peel-and-stick backsplash worth it, or should I save for real tile?
Peel-and-stick is worth it as a temporary solution with a 2- to 5-year horizon. It looks good from normal viewing distance, installs in an afternoon, and costs a fraction of real tile. It will not fool a home inspector or a buyer who looks closely, and the edges can start to lift in high-humidity kitchens after a few years. If you plan to sell within 2 years, use peel-and-stick. If you plan to stay 5 or more years, save for real tile. The price difference on a standard 30-square-foot backsplash is roughly $300 for peel-and-stick versus $600 to $900 for professionally installed subway tile. Over 10 years, the real tile costs $30 to $90 per year. The peel-and-stick replaced twice over the same period costs about the same.
Are IKEA cabinets a good budget option?
IKEA cabinets are the best-value new cabinet option on the market at roughly $3,000 to $6,000 for a full kitchen. The boxes are particleboard with a melamine finish, which is less durable than plywood boxes from custom cabinetmakers, but the hardware, Blum soft-close drawers and hinges, is the same brand used in cabinets costing three times as much. The assembly is time-consuming but straightforward with basic tools. The primary limitation is sizing, IKEA uses standard widths that may not perfectly fit a kitchen with unusual dimensions. For a kitchen with a standard layout, IKEA cabinets with aftermarket custom door fronts from a company like Semihandmade offer a near-custom look at roughly half the cost of a semi-custom cabinet line.
Is DIY cabinet painting worth the effort, or should I hire a pro?
DIY cabinet painting is worth it if you have a weekend, patience for surface preparation, and a willingness to learn the process. Professional cabinet painting costs $2,000 to $5,000 and produces a factory-smooth finish using a sprayer in a controlled environment. DIY cabinet painting costs $100 to $300 and produces a finish that looks excellent from 3 feet away but shows brush marks or roller texture up close. The difference matters if the kitchen is the centerpiece of a high-end home on the market. It matters less if the kitchen is in a mid-range home where the alternative is not a $5,000 pro job but leaving the 1990s oak as-is indefinitely. Most homeowners who regret DIY cabinet painting regret the shortcut they took on surface preparation, not the decision to DIY.
Do I need permits for a budget kitchen remodel?
It depends on what you are doing. Painting, hardware replacement, backsplash installation, cabinet refacing, and countertop resurfacing do not require permits. Moving plumbing, adding or moving electrical outlets, installing new circuits, removing walls, and changing the kitchen’s footprint require permits in most jurisdictions. If you are hiring a contractor for any work that requires a permit, the contractor should pull the permit. If a contractor suggests skipping the permit to save money, walk away. The permit protects you from unlicensed work that could block a future home sale.