Your ceiling fan has been running on a wall switch and pull chains for years. You want the convenience of a remote control without replacing the entire fan. A universal remote control kit installs inside the existing fan canopy and takes over the same functions the wall switch and pull chains currently control. The kit costs $25 to $40, takes 30 to 45 minutes to install, and works on most AC-motor ceiling fans manufactured since the 1980s.
The installation is straightforward: a receiver module connects between the house wiring and the fan motor and light. The wall switch that controlled the fan must remain permanently on. The pull chains that you used to change fan speed and turn on the light become redundant. The remote does everything. Here is how to determine if your fan is compatible, install the receiver, and set it up so your remote controls your fan and not your neighbor’s.
Step One: Check If Your Fan Is Compatible
A universal remote control kit works with most AC-motor ceiling fans. If your fan makes a humming noise that changes pitch with the speed, and the pull chain cycles through three speeds plus off, it is almost certainly an AC motor fan and is compatible. If your fan is silent, has six speeds, and was sold with the word DC on the box, it uses a DC motor. DC-motor fans have a proprietary motor controller integrated into the motor housing. A universal remote receiver cannot be wired between the house circuit and a DC motor controller without bypassing the controller, which is not possible on most models. If your fan is a DC model, you must use the remote kit sold by the fan manufacturer, which replaces the existing controller rather than adding a receiver in series.
The fan must have separate wires for the fan motor and the light. Open the existing canopy or switch housing and look at the wiring. If there is a black wire and a blue wire connected to the fan, plus a white neutral wire, the fan has separate motor and light circuits and is compatible. If there is only one black wire and the fan and light are controlled by a single pull chain or a single wall switch, the remote receiver can still be installed, but the light and fan will be controlled together by the fan speed buttons, not independently.
Per ENERGY STAR specifications, ceiling fans manufactured after 2009 are required to include a minimum of three speed settings and a separate light control circuit. Most fans manufactured in the last 25 years meet these criteria and are compatible with universal remote kits.
Step Two: Choose the Right Remote Kit
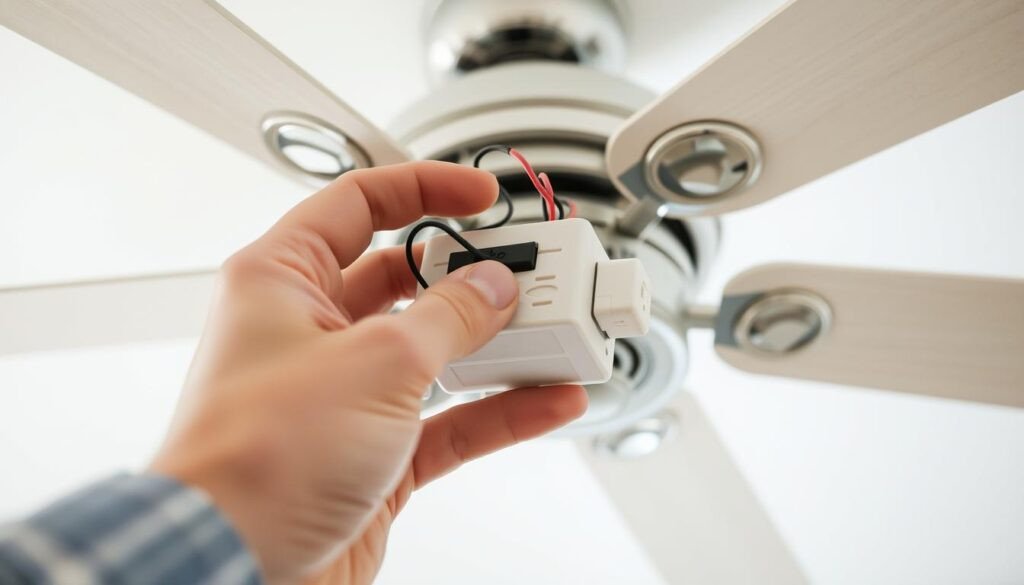
Universal ceiling fan remote control kits are sold at hardware stores, home centers, and online. The kit includes a receiver module and a handheld remote. The receiver is a rectangular black or white box approximately 4 inches by 3 inches by 1 inch. It must fit inside the fan canopy or the switch housing. Measure the available space before buying the kit. Some fan canopies are shallow and will not accommodate a receiver. The remote control is a handheld unit with buttons for fan off, three or four fan speeds, light on and off, and sometimes a dimmer function.
Choose a kit that matches your fan’s features. If your fan has a light, buy a kit with light control. If your fan does not have a light, buy a fan-only kit, which is cheaper. If your fan has a light and you want dimming capability, buy a kit with a dimmer function. The kit packaging lists the fan motor wattage limit, typically 150 to 190 watts. Most residential ceiling fans draw less than 100 watts. The limit is unlikely to be exceeded unless the fan is unusually large or powerful.
Step Three: Install the Receiver
Turn off the power at the breaker. Verify the circuit is dead with a non-contact voltage tester. Remove the fan canopy or the switch housing cover to access the wiring. The canopy is the decorative cover at the ceiling. The switch housing is the lower housing that contains the pull chain switches and the reversing switch. The receiver can be installed in either location as long as it fits. The canopy typically has more space.
Identify the existing wiring connections. The house wiring comes from the ceiling box: a black hot wire, a white neutral wire, and a bare or green ground wire. The fan wiring goes to the motor and the light: a black motor wire, a blue light wire, and a white neutral wire shared by both. Disconnect the house wires from the fan wires. Do not disconnect the fan motor wires from the motor or the light wires from the light. You are inserting the receiver between the house and the fan, not replacing the fan wiring.
The receiver has three sets of wires, clearly labeled on the receiver or in the manual. Input wires connect to the house: black to black, white to white. Output wires connect to the fan: black to fan motor black, blue to fan light blue, white to both the fan motor white and the light white. The receiver may have a separate ground wire that connects to the house ground and the fan ground. Connect all wires with wire nuts, twisting the copper together before screwing on the nut.
Tuck the receiver into the canopy or the switch housing. The receiver should not press against any moving parts. The antenna wire, a thin wire extending from the receiver, must be uncoiled and kept away from metal components. A coiled antenna or an antenna trapped against the metal fan bracket reduces the remote’s range. Tuck the wires neatly around the receiver. Reinstall the canopy or switch housing cover. The cover should close completely without forcing it.
Step Four: Set the DIP Switches
The receiver and the remote both have a set of DIP switches, which are tiny physical switches that set the communication code. The switches on the receiver and the remote must be set to identical positions. If they do not match, the remote cannot control the fan.
The DIP switches on the receiver are located on the receiver body. Set them to a unique code before closing the canopy. Do not leave them in the factory default position, which is typically all switches in the down position. A neighbor’s fan or another fan in your house may be using the same default code. Choose a random pattern and record it. Write the code on a piece of tape and stick it inside the remote battery compartment. You will not remember it when you replace the remote or the battery years later.
The DIP switches in the remote are inside the battery compartment. Slide the battery cover off. The switches are small white or blue sliders. Set them to match the receiver exactly. Install the battery, typically an A23 12-volt battery, which is included with most kits. Close the battery compartment.
Step Five: Finalize the Wall Switch and Test
Turn the power back on at the breaker. The wall switch that controlled the fan must be in the on position. The receiver requires constant power. If the switch is turned off, the receiver loses power and the remote cannot control the fan. Test the remote. Press the fan speed buttons and the light button. The fan should respond immediately. If the remote does not work, check that the wall switch is on, the battery is installed correctly, and the DIP switches on the receiver and remote match.
Secure the wall switch in the on position. Options include installing a switch guard, which is a plastic cage that screws onto the switch plate and prevents accidental operation, wiring the switch as always-on and replacing the switch with a blank cover plate, or leaving the switch as-is and training household members not to touch it. The switch guard is the easiest option that preserves the ability to disconnect power for maintenance.
Set the pull chains on the fan to their highest settings. The fan speed pull chain should be set to high speed. The light pull chain should be set to on. The reversing switch should be set to the desired direction for the season. The remote now controls speed and light. The pull chains are redundant and should not be used. If someone pulls the fan speed chain to medium or low, the remote can only slow the fan from that lower maximum. The fan will never reach full speed until the pull chain is returned to high.
Troubleshooting Remote Installation Problems
The fan hums after installing the receiver. This is the most common complaint about retrofit remote kits. The receiver controls fan speed by rapidly switching the power to the motor on and off, a technique called phase-angle control. Some AC motors hum noticeably when powered this way. The hum is typically louder at low and medium speeds and quieter at high speed. If the hum is objectionable, the only fix is to remove the receiver and return to wall-switch and pull-chain control. The humming is a characteristic of the motor and the receiver combination. It is not a defect in the receiver.
The remote controls the wrong fan or a neighboring fan. The DIP switch code matches another receiver. Change the DIP switches on one receiver to a different code and match the corresponding remote. Write down both codes.
The remote works intermittently or only at close range. The receiver antenna is blocked or coiled. Open the canopy, uncoil the antenna, and position it away from the metal bracket. The battery is weak. Replace it. The LED light bulbs in the fan are causing radio frequency interference. Cheap LED bulbs can emit electromagnetic noise that disrupts the remote signal. If the problem started when you changed the bulbs, try different bulbs.
Sources and Limitations
The ENERGY STAR compatibility reference cited in this guide is based on the U.S. Environmental Protection Agency’s ceiling fan specification, which establishes minimum performance criteria for fans manufactured after 2009. The radio frequency operating parameters for remote control devices are governed by Federal Communications Commission Part 15 regulations. At the time of writing, additional authoritative sources for residential ceiling fan remote control installation could not be independently verified through web retrieval. Specific product compatibility should be confirmed with the remote control kit and fan manufacturers’ documentation.
Frequently Asked Questions
My fan does not have a light. Do I still need a kit with light control?
No. Buy a fan-only remote kit. The kit is cheaper and simpler to install because there is no blue light wire to connect. The receiver only has motor output wires. Cap the unused light output wire on the receiver with a wire nut, which is specified in the kit instructions. Do not cut the wire off. It may be needed if a light kit is added to the fan later.
Should I remove the pull chains after installing a remote?
You can, but it is not required. Set the pull chains to high speed and on, then tuck them into the switch housing or canopy. If someone accidentally pulls the chain to a lower speed, the fan will not reach full speed until the chain is returned to high. Some homeowners cut the chains short and replace the pull chain handles with small plastic caps. Removing the pull chains entirely requires opening the switch housing and disconnecting them from the switches, which is more work than it is worth.
Can I install a remote receiver if my fan is on a two-story ceiling?
Yes, but you cannot reach the receiver to change DIP switches or troubleshoot it once the canopy is closed. Set the DIP switches, pair the remote, and test the fan on the ground before reinstalling the canopy on a tall ceiling. Use a remote with a wall-mount cradle that can be mounted at the standard switch height on the wall, so the handheld remote is always in a known location. A remote lost in a room with a 20-foot ceiling is a remote you will never find.