A subway tile backsplash is the most common first tile project for a reason. The area is small, typically 20 to 40 square feet. The surface is a kitchen wall, which is flat and dry. The tile is small enough to cut with a manual snap cutter. The project takes a weekend and costs $100 to $300 in materials. The result transforms the kitchen more than any other single-day DIY project, short of painting the cabinets.
The backsplash is a dry area. You can tile directly over drywall, and you can use premixed mastic adhesive instead of powdered thinset. There is no waterproofing, no backer board, and no heavy tile to support. The only challenging cuts are around the electrical outlets. Here is how to lay out the tile, make the cuts, and finish the edges.
Preparation: Clean the Wall and Plan the Layout
Remove the outlet covers and switch plates. Turn off the power to the kitchen receptacles at the breaker. You will be working around exposed electrical boxes. The power must be off. Unscrew the outlets and switches from their boxes and pull them forward so they sit on top of the existing wall. They will be remounted on top of the tile after it is installed. The ears of the outlets and switches must rest on the tile surface, not be buried behind the tile. This requires extending the outlet boxes or using longer screws. Box extenders are plastic spacers that fit behind the outlet ears and compensate for the thickness of the tile and adhesive. They cost $2 to $3 each. Buy them when you buy the tile.
Clean the wall. Grease, dust, and cooking residue prevent the adhesive from bonding. Wipe the wall with a degreaser or TSP substitute. Rinse with clean water and let it dry. The wall does not need to be sanded. The mastic bonds to the drywall paper and the existing paint. Scuff-sanding glossy paint helps adhesion but is not required. The most important prep is a clean, grease-free surface.
Dry-lay a row of tile on the countertop with spacers. Subway tile is typically 3 inches by 6 inches. Measure the total length of the backsplash and find the center. Adjust the starting point so that the cut tiles at the ends are at least half a tile wide. A sliver of cut tile at the edge is the most visible sign of a layout that was not planned. Shift the layout left or right by half a tile to eliminate narrow cuts. Mark the center line on the wall with a pencil.
Subway Tile Pattern: The Offset Decision
Subway tile is installed in a running bond pattern, which means the vertical joints are offset from row to row. The standard offset is 50 percent, where each tile is centered over the joint of the two tiles below it. A 50 percent offset is the classic subway look. Some tiles, particularly larger format subway tiles or tiles with a pronounced surface texture, require a maximum offset of 33 percent to prevent lippage. The tile manufacturer’s instructions specify the maximum offset. If the tile is labeled as suitable for 50 percent offset, use 50 percent. If the tile requires a maximum of 33 percent offset, follow that requirement. A 50 percent offset on a tile not designed for it produces lippage that cannot be fixed.
The offset is built into the tile. Subway tile sheets are typically mesh-backed with the tiles pre-spaced and pre-staggered. The mesh sheets make installation faster because you set several tiles at once rather than placing each one individually. Check that the spacing on the mesh is consistent before you start. Mesh sheets from the same box are usually consistent. Mesh sheets from different boxes can have slightly different spacing, which is visible in the finished backsplash. Mix sheets from different boxes as you install to average out any variations.
Apply the Adhesive
Use premixed ceramic tile mastic, not powdered thinset. Mastic is acceptable for kitchen backsplashes because the area is dry. It comes in a tub, ready to use. Spread the mastic on the wall with a 1/4-inch by 1/4-inch square-notch trowel. Hold the trowel at a consistent 45-degree angle. The ridges of mastic should all be the same height. Spread an area of approximately 3 to 4 square feet, which is about 30 minutes of tiling work. The mastic skins over after 30 to 45 minutes and will not bond to tile placed after it has dried. Do not spread more than you can cover in that time.
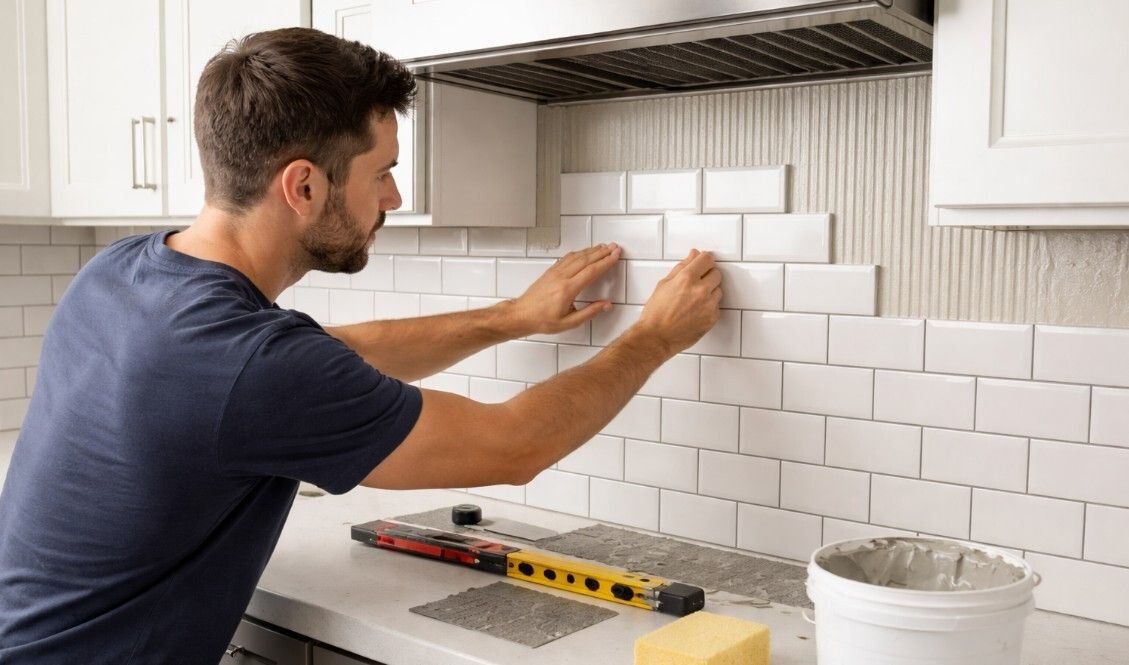
Press the mesh sheets into the mastic. Start from the countertop and work upward. The first row sits directly on the countertop with no spacer at the bottom. The countertop is the straightest reference line in the kitchen. If the countertop is not level, the tile will follow it and the unevenness will be visible at the top. For a countertop that is more than 1/8 inch out of level over the length of the backsplash, snap a level line on the wall and cut the bottom row of tile to follow the line. The cut edge faces the countertop and is covered by a bead of caulk. The level line is the right approach for a professional result. The countertop-as-reference approach is faster and acceptable if the countertop is reasonably level.
Press each sheet firmly into the mastic with a slight twisting motion. The sheets have a plastic mesh backing that should embed fully into the mastic. Sheets that are not pressed firmly enough will not bond across their entire surface. After installing a few rows, place a level across the top edge of the installed tile. Adjust any sheets that have drifted out of level. The mesh backing allows sheets to stretch slightly, which can cause the joints between sheets to widen. Keep the spacing between sheets consistent with the spacing within the sheets. A joint that is visibly wider between two sheets than between the tiles within a sheet is a sign that the sheets were not aligned properly.
Making the Cuts
Cut subway tile with a manual snap cutter for straight cuts. Score the tile face with one firm stroke, then snap. The cut edge is straight but slightly rough. Position the cut edge at the corners and at the countertop line where it will be hidden by caulk or by adjacent tiles. The factory edge faces the visible areas. Cut tiles at the ends of the backsplash with the cut edge facing the corner. The corner joint is caulked, which hides the cut.
Cut tile around electrical outlets with a wet saw or an angle grinder with a diamond blade. The cuts are L-shaped or U-shaped to fit around the outlet boxes. Mark the cut on the tile face with a pencil. The cut tile must fit around the box and leave approximately 1/8 inch of clearance on all sides. The clearance is covered by the outlet cover plate. A tile that is cut too close to the box will crack when the outlet is screwed in. A tile that is cut too far from the box will leave a visible gap.
Tile nippers work for small cutouts and notches on subway tile. Score the cut line with the nippers and nibble away small pieces of tile until you reach the line. Nippers produce a rougher edge than a saw. Use them for cuts that will be covered by the outlet plate or hidden in a corner.
Grout, Caulk, and Edge Finishing
Let the mastic dry for 24 hours before grouting. Remove the spacers before the mastic fully dries, approximately 30 to 60 minutes after setting the tile. Use unsanded grout for subway tile with joints of 1/8 inch or narrower, which is standard. Sanded grout scratches the glazed surface of subway tile. Apply the grout with a rubber float, pressing it into the joints. Wipe excess grout from the tile surface with a damp sponge. Let the grout cure for 24 hours. Seal the grout with a penetrating grout sealer. The backsplash near the sink and behind the stove is exposed to water, grease, and food splatter. Sealed grout resists staining. Unsealed grout absorbs everything and darkens permanently.
Caulk the joint between the countertop and the first row of tile with silicone caulk, color-matched to the grout. Grout in this joint cracks because the countertop moves independently of the wall. Caulk the corners where the backsplash meets the walls. Caulk the joint where the tile meets the underside of the cabinets. Grout on any change of plane cracks. Caulk flexes.
The exposed edges of the backsplash, typically at the ends of the counter or where the backsplash terminates without a wall, need an edge finish. Options from cleanest to simplest include a bullnose tile that matches the subway tile and has a finished curved edge, a metal tile edging profile in a matching finish that slides under the tile and creates a clean line, or caulk along the cut edge painted to match the tile, which is the least polished option but is acceptable for a small exposed edge that is not highly visible. The edge finish should be decided before tiling because the metal edging profile must be installed under the tile as you lay it.
Frequently Asked Questions
Can I install subway tile over painted drywall without sanding?
Yes, as long as the paint is not peeling and the wall is clean. Sanding glossy paint improves adhesion but is not required for a backsplash. The tile is lightweight and is not subject to the moisture and weight loads of a shower wall. If the paint is high-gloss, scuff it with 80-grit sandpaper for 30 seconds per square foot. If the paint is eggshell or flat, clean it and tile over it.
How do I handle the gap between the countertop and the tile?
The first row of tile sits directly on the countertop. If the countertop is level, use a 1/8-inch spacer between the tile and the countertop to create a consistent gap for caulk. If the countertop is uneven, set the tile directly on the countertop and the gap will vary slightly. The caulk fills the gap and hides the variation. A 1/8-inch gap at the bottom, filled with silicone caulk, is the standard detail for a tiled backsplash.
Can I install subway tile without a wet saw?
Yes. A manual snap cutter handles all the straight cuts. An angle grinder with a diamond blade, a pair of tile nippers, and patience handle the outlet cutouts. The cut edges around outlets are covered by the cover plate. Perfection is not required. A wet saw is faster and produces cleaner cuts, but it is not necessary for a small backsplash with a limited number of outlet cutouts. Rent one for $50 to $80 per day if you have several outlets and want clean cuts with less effort.