Glue-down vinyl plank flooring is a different product from the click-lock floating vinyl plank that dominates the flooring aisle. Glue-down planks are thinner, typically 2 to 4 millimeters compared to 5 to 8 millimeters for click-lock. They do not click together. Each plank is glued directly to the subfloor with adhesive spread with a trowel. The result is a floor that feels solid underfoot, never separates at the seams, and can be installed in rooms where floating floors are not recommended, including bathrooms, laundry rooms, and commercial spaces.
The trade-off is labor. Glue-down installation takes longer than floating installation. The subfloor must be flatter because every imperfection telegraphs through the thin plank. And the adhesive is a commitment. A plank glued in the wrong place cannot be unclicked and repositioned. It must be pried up, the adhesive scraped off, and the subfloor re-troweled. Here is how to do it correctly.
Glue-Down vs. Floating Vinyl Plank
| Feature | Glue-Down | Floating (Click-Lock) |
| Thickness | 2–4 mm | 5–8 mm |
| Feel underfoot | Solid, no hollow sound | Slightly hollow, echoes |
| Subfloor flatness requirement | Very flat: 3/16″ over 10 ft | Flat: 3/16″ over 10 ft |
| Moisture resistance | Better—no gaps for water to seep through | Good but water can reach subfloor at seams |
| Installation speed | Slower (troweling adhesive) | Faster (click and go) |
| Replacement | Difficult (adhesive bond) | Easy (unclick and remove) |
| Best for | Bathrooms, kitchens, commercial, high-traffic | Bedrooms, living rooms, quick installs |
Choosing the Right Adhesive
Glue-down vinyl plank uses one of two adhesive types. The wrong adhesive ruins the floor.
Pressure-sensitive adhesive is the most common for residential installation. It is applied with a trowel and allowed to dry to the touch, typically 30 to 60 minutes, before the planks are set into it. The dried adhesive is tacky, not wet. The plank bonds to the adhesive when pressure is applied. Pressure-sensitive adhesive allows minor repositioning during installation because the bond forms gradually. It is the more forgiving choice for a first-time installer. After the floor is installed, the adhesive continues to cure and the bond strengthens over 24 to 48 hours.
Hard-set adhesive is a wet-set adhesive that bonds the plank immediately. The plank is set into wet adhesive and cannot be repositioned after it makes contact. Hard-set adhesive is used for commercial installations and for vinyl plank in high-moisture areas. It is less forgiving and is generally not recommended for DIY installation because a misaligned plank cannot be moved once it touches the adhesive.
The vinyl plank manufacturer specifies which adhesive to use. The warranty is void if you use a different adhesive than the one recommended. The adhesive recommendation is printed in the installation instructions. Read it. Do not use a general-purpose flooring adhesive unless the manufacturer’s instructions explicitly permit it.
Subfloor Preparation: The Most Important Step
Glue-down vinyl plank is unforgiving of subfloor imperfections. Every bump, divot, seam, and grain pattern in the subfloor telegraphs through the thin plank and is visible on the surface. The subfloor must be flat to within 3/16 inch over a 10-foot span. It must be clean, dry, and free of any debris. A single grain of sand under a glue-down plank creates a visible bump.
Sweep, vacuum, and then wipe the subfloor with a damp cloth. The subfloor must be completely clean. For concrete subfloors, fill low spots with a cement-based floor patch and grind down high spots. For wood subfloors, screw down any loose areas, fill gaps with floor patch, and sand high spots at the plywood seams. The subfloor must be smooth. If you can feel a seam with your fingers, it will be visible through the plank.
For concrete subfloors, test for moisture with a calcium chloride test kit. The maximum allowable moisture emission rate is specified by the adhesive manufacturer, typically 3 to 5 pounds per 1,000 square feet per 24 hours. If the moisture level exceeds the limit, apply a moisture mitigation sealer before installing the adhesive.
Prime the subfloor if the adhesive manufacturer recommends it. Priming improves the bond between the adhesive and the subfloor, particularly on porous surfaces such as concrete and plywood. The primer is rolled on with a paint roller and dries in 30 to 60 minutes.
Plan the Layout
The same layout principles apply as for any plank flooring. Run the planks parallel to the longest wall or parallel to the primary light source. Measure the room width perpendicular to the plank direction. Calculate the width of the last row. If it is less than 2 inches, cut the first row narrower so that both the first and last rows are at least 2 inches wide. Mark the starting line on the subfloor with a chalk line. The first row of planks sets the alignment for the entire floor. If the first row is crooked, every subsequent row is crooked. Snap a straight chalk line and follow it.
Stagger the end joints by at least 6 inches for glue-down vinyl plank. The stagger requirement is shorter than the 12-inch requirement for laminate because vinyl plank joints are tighter and the planks are shorter. Avoid H-patterns where the end joints of every other row line up, and stair-step patterns where the joints form a diagonal line across the floor. Random stagger looks more like wood.
Apply the Adhesive and Install the Planks
Spread the adhesive with the trowel specified by the adhesive manufacturer. The trowel notch size determines how much adhesive is applied, which affects the bond strength and whether the adhesive bleeds through the seams. The correct trowel is specified on the adhesive container. A 1/16-inch by 1/16-inch square-notch trowel is common for pressure-sensitive adhesive. A V-notch trowel may be specified for some products.
Spread adhesive in sections of approximately 3 feet by 3 feet, which is about the area you can cover with planks in 10 to 15 minutes. Do not spread adhesive over the entire room at once. The adhesive skins over or dries before you can install the planks. If using pressure-sensitive adhesive, let it dry to the touch before installing planks. The adhesive should feel tacky but not transfer to your finger. The drying time is 30 to 60 minutes depending on temperature and humidity. If using hard-set adhesive, install the planks immediately into the wet adhesive.
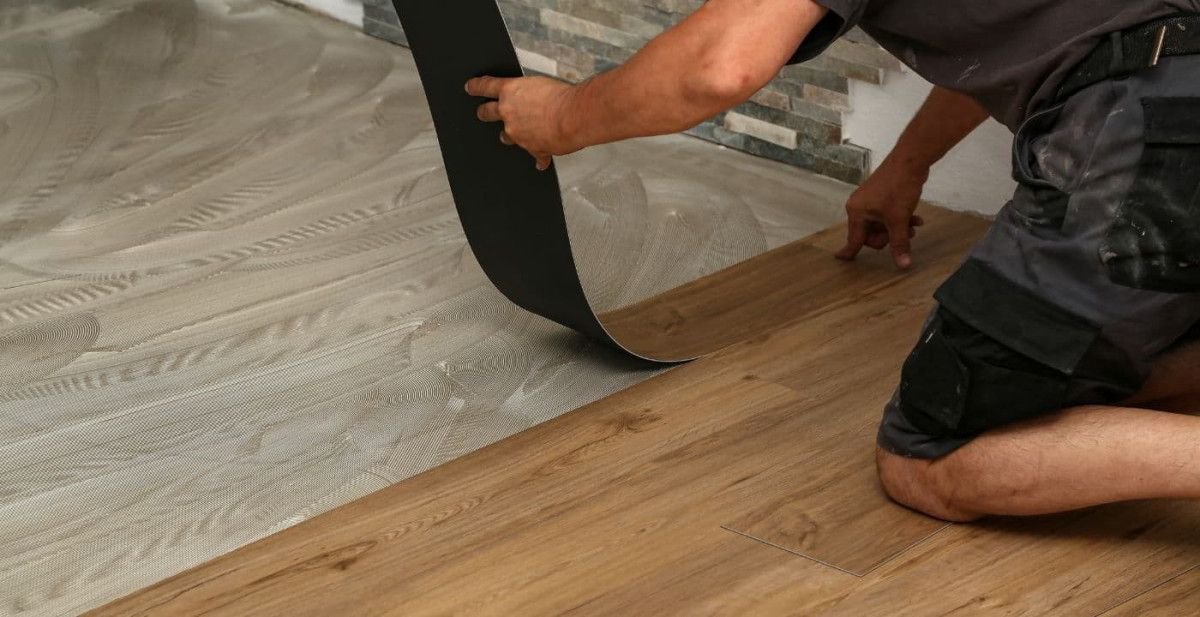
Lay the planks into the adhesive starting from the chalk line. Press each plank firmly into the adhesive with hand pressure. Do not slide the plank into position. Sliding pushes adhesive up into the seam. Place the plank straight down and press it into place. Butt the edges together tightly. Glue-down vinyl plank does not have a click-lock mechanism. The planks are square-edged and butt together. The seams should be tight with no visible gap.
Work across the room in sections. After installing planks in a section, roll the floor with a 100-pound floor roller. The roller presses the planks into the adhesive and ensures full bond. A floor roller is a heavy steel cylinder with a handle, available for rent at tool rental stores for $15 to $25 per day. Rolling is not optional for glue-down vinyl plank. The pressure activates the adhesive bond. Hand pressure alone does not achieve the same bond strength as a roller.
Roll the entire floor again 30 to 60 minutes after completing the installation, and a third time the following day. Three passes with the roller are standard for pressure-sensitive adhesive. The roller may push adhesive up through the seams. Wipe any adhesive that appears on the surface immediately with a clean cloth dampened with the adhesive manufacturer’s recommended cleaner. Water may not be sufficient to remove the adhesive.
Curing and Traffic
Light foot traffic is allowed immediately after rolling. Do not walk on the floor in high heels or shoes that could dent the planks while the adhesive is curing. Heavy furniture can be placed after 24 hours. Area rugs can be placed after 48 hours. The adhesive reaches full bond strength in 48 to 72 hours depending on temperature and humidity. Do not wet-mop the floor for at least 5 days after installation to allow the adhesive to cure completely.
Common Mistakes
Installing over a subfloor that is not perfectly clean. A single grain of sand creates a visible bump. Skipping the floor roller and relying on hand pressure. The roller is not optional. The bond strength depends on pressure. Using the wrong trowel and applying too much or too little adhesive. Too much adhesive bleeds through the seams. Too little adhesive fails to bond. Sliding planks into position instead of placing them straight down. Sliding pushes adhesive into the seams and creates gaps. Not wiping adhesive off the surface immediately. Dried adhesive on the plank surface is difficult to remove and may damage the wear layer.
Frequently Asked Questions
Can I install glue-down vinyl plank over existing tile?
Yes, if the tile is well-adhered, not cracked or loose, and the grout joints are filled flush with the tile surface. The grout lines must be skim-coated with a cement-based floor patch to create a smooth surface. The grout line pattern will telegraph through the vinyl if it is not filled. Once the grout lines are filled and the patch is dry, the tile surface is primed and the adhesive is applied. The tile must be clean and free of sealers or waxes that would prevent the adhesive from bonding.
How hard is it to remove glue-down vinyl plank later?
Harder than floating. The planks are bonded to the subfloor. Removal requires prying up the planks, which may leave adhesive residue on the subfloor. The adhesive can be scraped off with a floor scraper or dissolved with an adhesive remover. Concrete subfloors may require grinding to remove stubborn adhesive. The difficulty of removal is the primary disadvantage of glue-down installation compared to floating. Choose glue-down for the performance benefits. Choose floating for the ease of future replacement.
Can I install glue-down vinyl plank in a garage or sunroom?
Yes, if the temperature in the space stays within the range specified by the manufacturer. Vinyl plank expands and contracts with temperature. Extreme heat, such as in an uninsulated sunroom or a garage in summer, can cause the planks to expand and buckle. The maximum operating temperature is typically 100 to 120 degrees Fahrenheit. If the space exceeds this temperature, choose a different flooring material. Glue-down vinyl plank handles temperature variation better than floating vinyl because the adhesive restrains the planks and prevents them from moving independently.