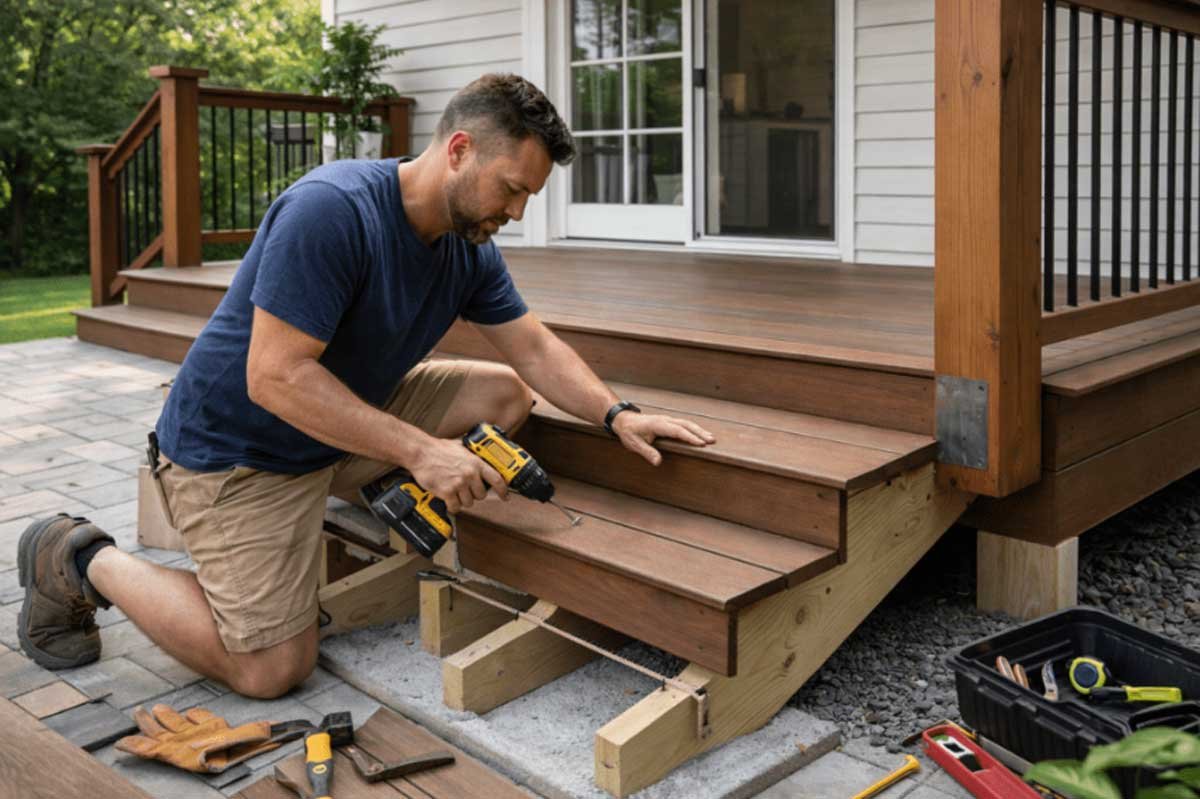
According to C&C Property Management professionals, how to build a deck step depends on the height from the deck surface to the landing: a low drop may need one boxed platform, while a taller drop needs properly calculated stair stringers. The mistake to avoid is guessing the height, because one awkward riser can make the whole step feel unsafe.
A deck step is simple carpentry only after the math is settled. Measure the total rise first, choose a landing that will not sink or wash out, then build the step so every riser is even, every tread has support, and every connection uses exterior-rated hardware. That is the real core of how to build a deck step without creating a tripping point.
Quick Answer: What Is the Safest Way to Build a Deck Step?
The safest way to build a deck step is to measure the total vertical drop, divide it into even risers, build on a firm landing, and fasten the step or stringers to solid deck framing.
For a single low step, a pressure-treated box step can work well when it sits on compacted gravel, pavers, or concrete and is tied back to the deck. For two or more steps, cut stair stringers from 2×12 stock or use approved metal stair hardware, then install treads, risers if needed, and a landing at the bottom. If a homeowner asks how to build a deck step for a patio door, this choice usually comes first.
Most residential stair rules are based on the International Residential Code, but local amendments matter. The common IRC baseline used by many jurisdictions is a maximum riser height of 7 3/4 inches and a minimum tread depth of 10 inches, with riser and tread variation kept within 3/8 inch. Treat those as a planning checkpoint, not a permit substitute.
| Deck height at walking surface | Better build method | Why it fits |
|---|---|---|
| Up to about 7 inches | One boxed deck step | A single riser can stay comfortable if the landing is firm and level. |
| About 8 to 15 inches | Two-step box or short stringers | Splitting the rise avoids one tall, awkward step. |
| More than about 15 inches | Cut stringers with full stair framing | Multiple even risers need the geometry and support of stair stringers. |
| More than 30 inches above grade | Permit-level stair, guard, and handrail review | Height usually triggers stricter guardrail and handrail requirements. |
Choose Between a Box Step and Stair Stringers
A box step is best for one low transition; stair stringers are better when the deck needs two or more equal steps. The decision is less about skill and more about total rise.
A box step is a shallow framed platform, usually made from pressure-treated lumber, that sits below the deck edge. It is forgiving for a ground-level deck because the frame can be squared, leveled, and shimmed before decking boards go on. The catch is drainage: wood that sits in damp soil will not age kindly, even if the first weekend looks perfect.
Stair stringers are angled structural boards with notches that support each tread. They solve a different problem: dividing a larger height into equal, repeatable steps. Cutting stringers takes more care, but it gives a cleaner walking rhythm and a stronger stair when the landing is farther below the deck.
“Also, do I need to create a hole for ventilation? All wood used was cedar. Bottom box is sitting on stones in the all 4 corners. Heavy stones also inside the bottom box to anchor steps. Thanks for you input!”
– r/Decks, May 2025
That kind of question is common because a step can look sturdy while trapping moisture underneath. If you build a box step, leave airflow, keep the frame off bare soil, and make the landing wider than the step so the edge does not crumble when someone plants a wet boot on it.
Tools and Materials for a Deck Step
You need ordinary framing tools for a deck step, but the material choices matter more than the tool list: pressure-treated lumber, exterior-rated fasteners, compatible connectors, and a stable landing are not optional outdoors.
Use ground-contact rated lumber where the step frame may be near grade. Use hot-dip galvanized or stainless fasteners if the lumber is treated, and match metal connectors to the fastener type. Mixing modern treated lumber with the wrong screws can shorten the life of the connection.
Basic Tool List
- Tape measure, pencil, speed square, and framing square
- 4-foot level or laser level
- Circular saw and jigsaw or handsaw for finishing stringer cuts
- Drill or impact driver with exterior-rated bits
- Clamps for holding framing parts flush
- Shovel, tamper, and rake for landing prep
- Eye protection, hearing protection, dust mask, and work gloves
Common Materials
- 2×12 pressure-treated lumber for stair stringers
- 2×6, 5/4 deck boards, or matching decking for treads
- 2×6 or 2×8 pressure-treated lumber for a box step frame
- Concrete pavers, compacted gravel, or a poured concrete pad for the landing
- Stair stringer hangers or approved structural connectors
- Exterior-rated structural screws or code-approved nails
- Flashing tape or joist tape where water collects on horizontal framing
The little annoyance in this job is that boards are rarely as dry, straight, or cooperative as the diagram in your head. Crown the lumber, reject badly twisted pieces for stringers, and dry-fit before committing to fasteners.
Measure the Rise and Run Before Cutting Anything
Deck step layout starts with total rise, the vertical distance from the finished deck surface to the finished landing surface. Every riser is calculated from that number.
Set a straight board on the deck surface and extend it out over the landing location. Hold it level, then measure down from the board to the planned landing surface. That is the total rise. If the landing is not built yet, include the future thickness of gravel, pavers, or concrete in the measurement.
Use the total rise to choose the number of risers. Divide total rise by a comfortable riser height, commonly around 6 1/2 to 7 1/2 inches, then round to a whole number. Divide the total rise by that number again to get the exact riser height. Decks.com notes that the difference between the largest and smallest stair rise or tread depth should not vary by more than 3/8 inch, a useful field rule to keep the stairs from feeling uneven.
| Measurement | How to calculate it | Field note |
|---|---|---|
| Total rise | Deck surface height minus landing surface height | Measure from finished surfaces, not bare dirt. |
| Number of risers | Total rise divided by target riser height, then rounded | Keep each riser at or below local maximum. |
| Exact riser height | Total rise divided by number of risers | All risers should be nearly identical. |
| Number of treads | Usually one fewer than risers when the deck surface acts as the top step | Confirm with your exact stair layout. |
| Total run | Number of treads multiplied by tread depth | Use at least 10 inches as a common planning minimum. |
Here is a worked example. If the total rise is 21 inches, three risers gives an exact riser height of 7 inches. If each tread is 10 inches deep and the deck surface acts as the top step, the stair needs two treads and a total run of about 20 inches, plus landing space.
Single Box Step Method for Low Decks
A single deck step can be built as a boxed platform when the rise is low enough and the bottom sits on a stable, draining base. Keep it square, level, and tied to the deck. This is the simplest version of how to build a deck step, but it still needs real support under it.
- Confirm the finished step height. Measure from the deck surface to the landing. If the drop is taller than a comfortable single riser, build two steps or switch to stringers.
- Prepare the landing. Remove loose soil and organic material. Add compacted gravel, pavers, or concrete so the step rests on something that drains and resists settling.
- Cut the frame boards. Use pressure-treated 2×6 or 2×8 lumber depending on the needed rise. Build the box slightly wider than the doorway or traffic path.
- Assemble the rectangle. Clamp the boards, check diagonals for square, then fasten with exterior-rated structural screws or approved nails.
- Add blocking. Install interior blocking so the decking boards have firm support. If the step is wide, blocking keeps the top from feeling springy.
- Set and level the box. Place it on the landing base and check level front to back and side to side. Shim with pavers or adjust gravel, not scraps of untreated wood.
- Attach it to the deck framing. Fasten through solid blocking or rim framing where allowed. Do not rely on thin fascia boards to hold the step in place.
- Install decking boards. Leave appropriate gaps for drainage, align the front edge cleanly, and avoid overhanging boards so far that they flex.
A box step should not wobble, rock, or trap water. If it does, fix the base before adding more screws. Fasteners can pull parts together; they cannot make soft ground behave like concrete.
Stringer Method for Two or More Deck Steps
Deck steps with stringers are built by laying out equal rises and runs on 2×12 boards, cutting the notches accurately, and fastening the stringers to reinforced deck framing. Use this method when how to build a deck step becomes a small stair project rather than one platform.
- Mark the landing location. Use the calculated total run to locate the bottom of the stairs. The landing should be level, stable, and large enough for a safe foot plant.
- Lay out the first stringer. Set stair gauges on a framing square for the exact riser height and tread depth. Mark the sawtooth pattern on a straight 2×12.
- Adjust top and bottom cuts. Account for tread thickness and the way the stringer meets the deck. This is where many first-time builds end up with one odd riser.
- Cut carefully. Use a circular saw for the main cuts, then finish inside corners with a jigsaw or handsaw. Do not overcut the corners because it weakens the stringer.
- Test-fit the first stringer. Hold it in place and check the top connection, bottom bearing, and riser consistency before copying it.
- Use the first stringer as a pattern. Trace only after the first one fits correctly. A bad pattern makes every stringer bad faster.
- Install solid blocking at the deck rim. The stair connection needs structural backing, not decorative fascia.
- Attach stringers with approved connectors. Simpson Strong-Tie and other connector manufacturers publish deck stair connection hardware guidance, and local inspectors often expect connector use rather than improvised toe-screwing.
- Set stringer spacing. Many wood stair treads work with stringers at 16 inches on center, while some composite decking requires closer spacing. Follow the decking manufacturer instructions.
- Install treads and risers. Fasten boards evenly, keep gaps consistent, and check that nosing or overhang meets local rules.
A stair stringer is the angled structural support under the treads. A tread is the horizontal walking surface. A riser is the vertical face between treads. Those terms sound fussy until you are standing in the lumber aisle trying to decide whether the bottom cut should lose the tread thickness.
Deck Stair Code Basics to Check Before You Build
Deck stair code is local, but most checks focus on consistent riser height, adequate tread depth, landings, handrails, guards, lighting, and a secure stair-to-deck connection.
Use code numbers as a starting point, then verify with your city, county, or inspector. A detached platform step near grade may be treated differently from an elevated attached deck with guards and rails. The International Code Council publishes model codes, but jurisdictions adopt specific editions and amendments on their own schedule.
| Checkpoint | Common planning benchmark | Why it matters |
|---|---|---|
| Riser height | Often capped at 7 3/4 inches under IRC-based rules | Tall risers are harder to climb and easier to misstep. |
| Tread depth | Often at least 10 inches | Shallow treads do not give enough foot room. |
| Variation | Keep riser and tread variation within about 3/8 inch | Uneven stairs cause trips because the body expects rhythm. |
| Landing | Firm, level, and sized for the stair width | The bottom of the stair needs real bearing, not soft soil. |
| Handrail | Often required when there are four or more risers | Requirements vary by local code and stair height. |
| Guards | Often triggered when walking surfaces are over 30 inches above grade | Fall protection rules are stricter than simple step rules. |
| Fasteners | Exterior-rated and compatible with treated lumber | Corroded connectors make a stair unsafe from the inside out. |
For official confirmation, start with your local building department and the applicable residential code edition. For connector selection, manufacturer literature from Simpson Strong-Tie is useful because it shows the hardware approach inspectors commonly recognize.
Prepare the Landing and Attach the Step Correctly
The landing and the attachment point decide whether the step stays solid after rain, freeze-thaw movement, and repeated foot traffic. Build both before dressing up the surface.
The landing should be wider than the stair, flat enough for a full foot plant, and built on compacted material. Gravel with pavers can work for a low box step, while taller stairs often deserve a poured concrete pad. In cold climates, local frost-depth rules may affect footings and pads, especially when posts or stair supports are involved.
At the deck, attach to framing that can take load. Add blocking behind the rim joist if needed, then use stair stringer hangers or structural connectors. The common shortcut of driving screws through a stringer into fascia looks fine for a moment and ages badly.
If the stair turns a corner, wraps around a deck, or lands on a slope, slow down. Angled landings and uneven grade can turn a simple Saturday step into a layout problem. That is a good point to sketch the side view, mark exact finished heights, and confirm the path people will actually walk.
Common Mistakes When Building Deck Steps
The most common deck step mistakes are measuring from unfinished surfaces, building on soft ground, cutting every stringer from a bad pattern, and attaching stairs to weak trim.
- Measuring to dirt instead of the finished landing. The landing height changes once gravel, pavers, or concrete are added.
- Making one riser different. The top or bottom riser often goes wrong when tread thickness is ignored.
- Overcutting stringer corners. Those extra saw cuts reduce the remaining wood where the stringer is already notched.
- Using interior screws outside. Exterior stairs need corrosion-resistant fasteners and hardware.
- Spacing stringers too far apart. Composite and thinner decking may need tighter support than basic lumber.
- Skipping drainage. A boxed step that holds water will fail sooner than one that can dry.
- Forgetting handrail and guard triggers. A stair that is safe as a low platform may need rails once the deck height increases.
One Reddit commenter reacted to a deck-building video by saying, “I was scared for his hands when he was using the saw without really looking.” That blunt little line is a fair reminder: layout mistakes are annoying, but saw mistakes are not worth the shortcut. Clamp your work, keep both hands clear, and finish inside cuts with the right tool.
Final Inspection Before Using the Step
A finished deck step should feel boring in the best way: level underfoot, evenly spaced, firmly attached, and free of sharp edges or loose boards.
Walk the stairs slowly, then carry something light up and down. A bad step often reveals itself when your eyes are not staring at your feet. Listen for creaks, feel for bounce, and watch whether the landing shifts under weight.
- All risers are equal within the allowed tolerance.
- Treads are flat, secure, and deep enough for a full foot plant.
- The landing is firm, level, and draining away from wood.
- Stringers or box framing are attached to structural deck framing.
- Fasteners are exterior-rated and fully seated without splitting the boards.
- There are no saw overcuts, sharp corners, or protruding screw heads.
- Handrails and guards are installed where local code requires them.
- The step does not rock, rack, or pull away from the deck under body weight.
If any part fails this check, fix it before staining or trimming. Finish work has a way of making people forgive structural problems they should have solved while the framing was still visible.
FAQ About Building a Deck Step
Can I build one deck step without stringers?
Yes, one low deck step can often be built as a boxed platform without stair stringers. The box still needs pressure-treated framing, a firm draining base, and a solid attachment to the deck.
What is a comfortable deck step height?
A comfortable deck step height is often around 6 1/2 to 7 1/2 inches, but local code sets the actual maximum. If the drop is higher, split it into two or more equal risers.
How deep should a deck step be?
A deck step tread is commonly planned at 10 inches or deeper, depending on local code and tread design. Wider, deeper treads usually feel safer on outdoor stairs.
Do deck steps need a landing?
Deck steps need a stable bottom landing so the stair has solid bearing and users have a safe place to step. The required size and material depend on local code and stair height.
Should I use nails or screws for deck steps?
Use exterior-rated structural fasteners that are approved for the connector and treated lumber you are using. Do not substitute drywall screws, interior screws, or random leftover fasteners.
Bottom Line
The right deck step is the one that matches the measured rise, not the one that looks easiest in a video. Build a box step for a low, simple transition; use stringers when the height needs multiple risers; and let the landing, attachment, and code checks decide whether the job is truly done.