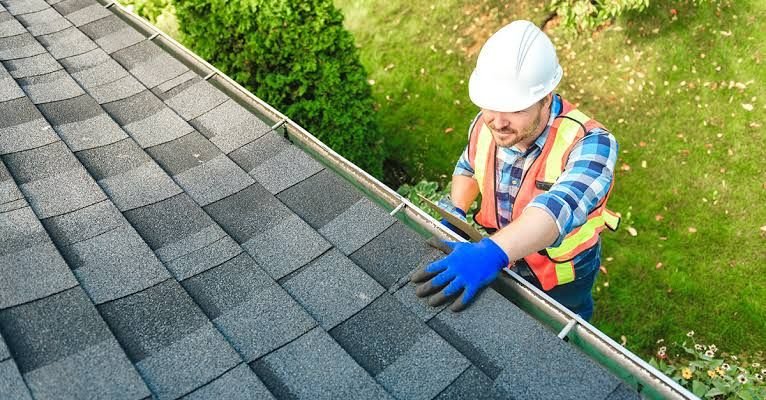
After a hailstorm, the difference between a covered roof replacement and a denied claim often comes down to what you document in the first 48 hours. This hail damage roof inspection checklist walks you through exactly what to look for, how to document it, and when to call a professional. Hail damage is not always visible from the ground, observes Carrollton property management.
A hailstorm that produces hailstones larger than one inch in diameter — roughly the size of a quarter — is capable of damaging asphalt shingles. Hailstones larger than 1.5 inches — roughly the size of a golf ball — will damage most roofing materials including metal panels and can crack tile or slate. The size of the hail matters. So does the duration of the storm, the wind speed, and the angle at which the hail struck the roof. All of these factors are documented in the storm report, and all of them matter to the insurance adjuster.
Step 1: Immediate Actions, Document Before You Climb
Photograph the hailstones themselves. If it is safe to go outside after the storm, collect a few representative hailstones and photograph them next to a coin, a quarter, a half-dollar, or a golf ball, to establish scale. The hailstones will melt or become smaller as they sit. The photo is time-stamped evidence of hail size at the time of the storm. This is the single most persuasive piece of evidence in a hail claim, and it disappears within hours.
Photograph everything at ground level first. Walk the perimeter of the house. Photograph every roof slope from multiple angles. Photograph the gutters and downspouts, hail damage often leaves impact marks on the soft metal of gutters and downspout elbows that are easier to photograph and just as valid as evidence of hail impact. Photograph any debris on the ground, shingle granules in the driveway, pieces of shingle mat, dents in outdoor furniture, dents in window screens or exterior light fixtures. All of these corroborate the hail event.
Check the air conditioning condenser. The fins on the outdoor condenser unit are soft aluminum. Hail impact leaves visible dents in the fins that are easy to photograph and impossible to argue were caused by anything other than hail. A dented AC condenser is collateral evidence that hail of sufficient size and force struck the property. Photograph it from multiple angles with a coin for scale.
Step 2: Ground-Level Signs of Hail Damage
Check the gutters and downspouts for granule accumulation. Hail impact knocks the ceramic granules off asphalt shingles. The granules collect in the gutters and at the downspout elbows. A significant accumulation of granules after a hailstorm, more than the normal, gradual granule loss of an aging roof, is strong evidence of hail damage. Scoop out a handful and photograph it. The color of the granules should match the color of the shingles on the roof.
Check for impact marks on soft metal. Gutters, downspouts, fascia, flashing, and vent covers are typically aluminum or galvanized steel. Hail impact leaves visible dents, dings, or circular impact marks in these surfaces. The marks are permanent, they do not fade or self-heal. Photograph every impact mark. The adjuster will look at the soft metal first because it is easier to access and the damage is unambiguous.
Check the siding. Vinyl and aluminum siding show hail impact as circular cracks, dents, or holes. Wood siding shows splintered impact craters. The directionality of the damage, concentrated on one or two sides of the house, corresponding to the wind direction during the storm, is evidence that the damage was caused by wind-driven hail, not by some other source. Photograph the damage from multiple angles showing both close-up detail and the wider facade.
Step 3: Roof-Level Inspection, What Hail Damage Looks Like
Do not climb onto a wet, steep, or damaged roof. If you are not comfortable or not equipped to safely access the roof, hire a professional. The roof-level inspection described below can be performed by a qualified roofing contractor or a home inspector with roofing experience. A fall from a roof is not worth a closer look at hail damage. Hire the inspector. The cost, $200 to $600, is reimbursable as part of the insurance claim if the claim is approved.
Look for hail strikes, random, circular impact marks. Hail damage to asphalt shingles appears as a random pattern of dark, circular impact marks where the hailstone knocked the granules off the shingle, exposing the black asphalt substrate underneath. The marks are random in distribution, they do not follow a pattern, they are not uniform in spacing, and they appear on multiple slopes. Wind damage appears along edges and corners. Hail damage appears scattered across the entire slope, concentrated on the side of the roof that faced the storm.
Feel for bruises in the shingle mat. Run your hand over the shingle surface, gently, not aggressively, to avoid causing additional granule loss. A hail impact that did not dislodge granules on the surface may still have bruised the shingle mat underneath. A bruise feels like a soft, indented spot in the shingle, the asphalt mat has been compressed and weakened by the impact. A bruised shingle will fail within one to three years as the damaged area loses its granules and the asphalt breaks down. The adjuster will check for bruises by pressing on suspect areas. Photograph any visible impact marks. Let the adjuster document the bruises.
Check the ridge cap. The ridge cap shingles, the shingles that cover the peak of the roof, are struck by hail at a near-perpendicular angle and often show the most severe damage on the entire roof. The ridge cap is also the most visible area from the ground and the easiest for an adjuster to access. Damage to the ridge cap is strong evidence that the rest of the roof was also struck.
Check roof penetrations. Vent pipes, plumbing stacks, attic fan housings, skylight frames, and chimney caps, any metal or plastic component that protrudes through the roof surface, should be inspected for impact marks, dents, cracks, or broken seals. Hail that cracks a plumbing vent boot creates a leak that may not be immediately visible from inside the attic. Photograph all damage to roof penetrations.
The National Roofing Contractors Association (NRCA) recommends that homeowners obtain an independent roof assessment after a major hailstorm rather than relying solely on the insurance company’s adjuster. An independent roofing contractor, one chosen by the homeowner, not one referred by the insurance company, can identify damage that a non-specialist adjuster might miss and can be present during the adjuster’s inspection to point out specific areas of concern.
Step 4: Insurance Claim Documentation
Compile your evidence before you call the insurance company. Organize your photos: hailstone photos with scale reference, ground-level damage photos, soft-metal impact photos, AC condenser photos, granule accumulation photos, and roof-level impact photos. Create a written list of every damaged item, roof slopes, gutters, siding, windows, exterior fixtures, AC unit, with approximate measurements and photo references. The more organized your documentation, the more credible your claim.
Get the storm report. The National Weather Service publishes storm reports that document hail size, wind speed, and storm track for significant weather events. Your insurance company will access this data independently, but having the report in hand when you file the claim demonstrates that you have done your homework. Search the NWS storm reports database or ask your roofing contractor to pull the report for your address and the date of the storm.
Call your insurance company within 48 hours. File the claim. Provide the date of loss, the storm report data, and a summary of the damage. Ask: “What is my wind and hail deductible?” The answer, typically 1% to 2% of the home’s insured value, determines whether filing a claim is financially worthwhile. If the deductible is higher than the estimated repair cost, pay for the repair out of pocket and do not file a claim. An unfiled claim does not affect your claims history.
Step 5: After the Claim Is Filed
Be present for the adjuster’s inspection. Walk the adjuster through your documentation. Point out every area of concern. Have your independent roofing contractor present if possible. The contractor speaks the adjuster’s language and can point out hail damage, particularly bruises and granule loss, that a generalist adjuster might not recognize as hail-caused.
Do not sign anything or accept a settlement check until you understand the scope of the damage and the cost of the repair. The adjuster’s initial estimate is an opening offer, not a final settlement. If the estimate is lower than the independent contractor’s estimate, request a re-inspection or a supplement. Supplements, additional payments for damage discovered after the initial estimate, are common in hail claims and are handled through the same adjuster.
Do not start permanent repairs before the adjuster completes the inspection. Tarp any active leaks. Do not replace shingles. The adjuster needs to see the damage as the storm left it. Replaced shingles are evidence of nothing except that the roof was repaired. The adjuster cannot approve a claim for damage they cannot see.
Frequently Asked Questions
What size hail causes roof damage?
Hailstones one inch in diameter, quarter-sized, or larger can damage asphalt shingles. Hailstones 1.5 inches, golf ball-sized, or larger will damage most roofing materials. The hail size, combined with wind speed, storm duration, and impact angle, determines whether damage occurred. A storm with quarter-sized hail and 60-mph winds causes more damage than the same hail falling straight down.
How soon after a hailstorm should I inspect my roof?
Inspect from the ground immediately after the storm, photograph hailstones, dents, and debris before they disappear. Schedule a professional roof inspection within 48 hours. The closer the inspection is to the storm date, the stronger the causal link between the hail and the damage. A roof inspection performed three months after a hailstorm cannot reliably attribute damage to that specific storm.
How can I tell the difference between hail damage and normal roof wear?
Hail damage appears as random, scattered, circular impact marks concentrated on the storm-facing slopes. Normal wear appears as uniform, gradual granule loss distributed across the entire roof. Hail damage to soft metal, gutters, downspouts, AC fins, vent covers, is particularly diagnostic because metal does not develop circular impact dents from normal aging. A roofing professional can distinguish between hail impact and age-related deterioration.
What if my insurance company denies my hail damage claim?
Request the denial in writing with specific reasons. Get a second opinion from an independent roofing contractor. If the contractor’s assessment differs significantly from the adjuster’s, request a re-inspection with the contractor present. If the re-inspection is also denied, consider hiring a licensed public adjuster who works on contingency, typically 10% to 15% of the final claim payment. A public adjuster represents you, not the insurance company.
Should I get multiple roof inspections after hail damage?
Yes. Get at least one independent assessment from a licensed roofing contractor in addition to the insurance adjuster’s inspection. The adjuster works for the insurance company. The contractor works for you. If the two assessments align, the damage estimate is reliable. If they differ, the discrepancy is the basis for negotiation or a re-inspection.
Does hail damage always require a full roof replacement?
No. Localized hail damage to a small area, a few shingles on one slope, can be repaired. Widespread hail damage across multiple slopes, particularly when the shingles are older and replacement shingles cannot be color-matched, typically requires full replacement. The insurance adjuster and the roofing contractor will assess the extent of the damage and recommend repair or replacement based on the percentage of the roof surface that is affected.
The Checklist, Condensed
- Photograph hailstones next to a coin for scale. They will melt, do this immediately.
- Photograph everything at ground level: roof slopes, gutters, siding, AC fins, debris.
- Check gutters for granule accumulation. Check soft metal for impact marks.
- Do not climb onto a wet or steep roof. Hire a professional for the roof-level inspection.
- Compile all evidence before calling insurance. Get the storm report.
- File the claim within 48 hours. Confirm your hail deductible.
- Be present at the adjuster inspection. Have your roofing contractor present.
- Do not start permanent repairs before the adjuster completes the inspection.
- Do not accept a settlement until you understand the scope of damage and cost of repair.
The 48 hours after a hailstorm determine whether the damage becomes a covered claim or an out-of-pocket expense. The hailstones melt. The evidence degrades. The memories fade. The photos you take today are the proof you will need in three weeks when the adjuster finally arrives. Take them now. The hail is not waiting. Neither should you. Ever watched an adjuster walk around your house for ten minutes, take three photos, and hand you an estimate that is half of what your contractor quoted? That adjuster just missed the bruised shingles, the dented flashing, and the ridge cap damage that your contractor found in the first five minutes. The adjuster is not dishonest. The adjuster is not a roofing specialist. Your contractor is. Bring them to the meeting.