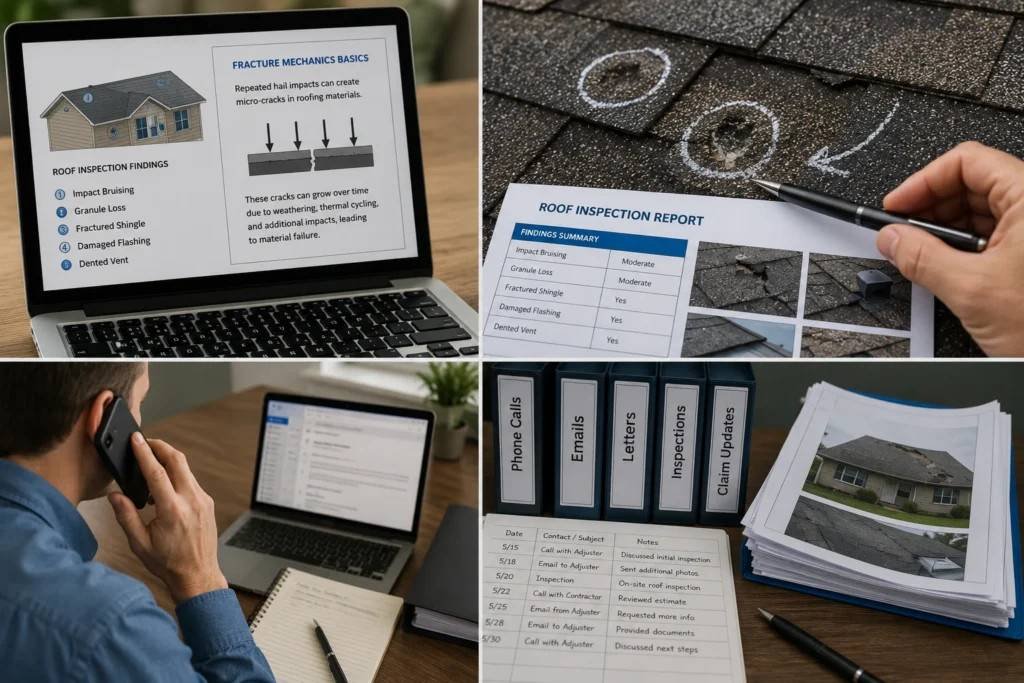
This hail damage insurance claim guide walks you through the five steps — from documenting the hailstones to negotiating the payout. Filing a hail damage insurance claim correctly — in the right order, with the right evidence, and with a contractor present during the adjuster’s inspection — is the difference between a claim that is approved for a full roof replacement and a claim that is denied or underpaid by thousands of dollars. The insurance company is not your adversary. The insurance company is also not your advocate. The insurance company is a business that evaluates your evidence against the terms of your policy. The quality of your evidence determines the outcome of the claim. The highest-quality evidence is a photo of a hailstone next to a coin taken during the storm, a photo of dented soft metal — gutters, downspouts, AC condenser fins — taken the morning after, and a professional contractor’s inspection report that identifies hail damage on the roof surface. The evidence must be collected within 48 hours of the storm. The hailstones melt. The dents oxidize. The evidence degrades with time. The clock starts when the storm ends. The clock is running. Here is the step-by-step process, in the order it must be done.
Step 1: Safety First — Do Not Go Onto the Roof
Do not climb onto a wet, steep, or hail-damaged roof. The roof surface is slippery from hail debris and loose granules. The fall from a roof is not worth a closer look at storm damage. The roof-level inspection can be performed safely from a ladder at the gutter line, with binoculars from the ground, or by a professional roofing contractor. The professional inspection costs $150 to $400 and is reimbursable as part of the insurance claim if the claim is approved. The professional inspection is the safer path. The hospital visit from a fall is more expensive than the professional inspection. The professional inspection is the right choice for anyone who is not trained and equipped for roof work.
Step 2: Document Everything Before You Touch Anything
Photograph the hailstones during or immediately after the storm. If it is safe to go outside, collect representative hailstones. Place them next to a coin, a quarter or a half-dollar, and photograph them. The hailstones will melt or shrink within hours. The photo is time-stamped evidence of hail size at the time of the storm. This is the single most persuasive piece of evidence in a hail claim. The hailstone is the proof. The coin is the scale. The photo is the evidence.
Photograph soft-metal damage from the ground. Walk the perimeter of the house. Photograph the gutters, the downspouts, the fascia, the window screens, the exterior light fixtures, and the air conditioning condenser. Hail impact on soft metal is the easiest storm damage to identify and the hardest to dispute. The dents on the gutters and the AC condenser fins are collateral evidence that hail of sufficient size and force struck the property. Photograph the dents from multiple angles with a coin held next to them for scale. The adjuster will examine the soft-metal damage. The dents on the gutters corroborate the hail strikes on the shingles.
Photograph the roof slopes from the ground. Walk around the house. Photograph every roof slope from at least two angles. Zoom in on areas where you can see granule loss or impact marks from the ground. The ground-level photos are the baseline documentation. The adjuster will look at the roof from the same angles. Your photos should match the adjuster’s view but be taken days earlier, before rain, before wind, before any evidence has degraded.
Check the gutters for granule accumulation. Hail impact knocks granules off the shingles. The granules collect in the gutters and at the downspout elbows. Scoop a small amount of granules from the gutter and collect them in a plastic bag. The granules are physical evidence of hail impact. The adjuster can examine the granules to confirm they match the shingles on the roof.
The National Roofing Contractors Association (NRCA) recommends obtaining an independent professional roof assessment after a major hail storm. The independent assessment identifies hail damage that a non-specialist adjuster might miss. The roofing contractor can be present during the adjuster’s inspection to point out specific areas of damage. The contractor’s presence is not adversarial, it is collaborative. The contractor and the adjuster look at the same roof. The contractor points out damage. The adjuster evaluates it against the policy. The collaboration produces a more accurate assessment than the adjuster working alone.
Step 3: Call a Roofing Contractor Before You Call the Insurance Company
Do not call the insurance company first. Call a reputable, local roofing contractor first, one who has experience with hail damage claims in your area. The contractor will perform a professional inspection and provide a written damage assessment with photos. The assessment identifies the type of damage, hail bruising, granule loss, impact fractures, the percentage of the roof surface that is damaged, and the contractor’s recommendation for repair or replacement. The assessment is the independent evidence that supports your claim. The contractor’s report is the documentation the adjuster will compare against their own findings. The adjuster’s findings may be less thorough than the contractor’s, the adjuster is on the roof for 20 to 30 minutes, the contractor may spend an hour or more. The contractor’s report is the detailed record. The detailed record supports the claim.
Be present during the adjuster’s inspection. Have your contractor present as well. The contractor walks the roof with the adjuster. The contractor points out each hail strike, each bruised shingle, each area of granule loss. The adjuster evaluates the damage. The contractor advocates for a thorough inspection. The advocacy is professional, two roof professionals evaluating the same surface. The advocacy produces a more accurate damage assessment. The more accurate assessment supports a higher claim payout. The claim payout is the difference between a roof that is repaired and a roof that is replaced. The replacement is what the policy covers if the damage exceeds the percentage threshold specified in the policy, typically 25% to 50% of the roof surface.
Step 4: File the Claim and Prepare for the Adjuster
Call the insurance company to file the claim. Provide the date of the storm, a brief description of the damage, and your contractor’s contact information. The insurance company will assign a claim number and an adjuster. The adjuster will contact you to schedule an inspection. The inspection typically occurs within 3 to 10 days of filing.
Before the adjuster arrives, compile your evidence package: the hailstone photos with scale, the soft-metal damage photos, the roof photos from the ground, the granule sample in a bag, the contractor’s written report with photos, and the National Weather Service storm report for your address. The NWS storm report documents the hail size, wind speed, and storm track on the date of the storm. Search the NWS database for your zip code and the storm date. Print the report. The report is independent meteorological verification that a hail event occurred at your address. The insurance company will access this data. Having it in hand demonstrates preparation. The preparation is the credibility. The credibility supports the claim.
Step 5: After the Adjuster’s Decision, Accept, Negotiate, or Appeal
The adjuster will provide a written estimate, the scope of work and the claim payout. Compare the adjuster’s estimate line-by-line with your contractor’s estimate. The adjuster’s estimate may omit items that the contractor included, decking replacement, drip edge, certain flashing, permit fees. The omissions are the difference between the adjuster’s payout and the actual cost of the replacement. The difference is negotiable.
If the adjuster’s estimate is lower than your contractor’s estimate, request a supplement from the adjuster. Provide the contractor’s line-item estimate as supporting documentation. The supplement process is normal, adjusters write estimates from the ground or from a quick roof walk. The contractor’s estimate is based on a detailed inspection. The supplement reconciles the two. Most supplements are approved without dispute if the line items are legitimate and the contractor’s pricing is within the normal range for your market.
If the claim is denied, request the denial in writing with specific reasons. The most common denial reasons are: the damage is not from hail, it is from blistering, normal wear, or mechanical damage, or the damage is below the policy’s deductible or percentage threshold. If the denial cites normal wear and your contractor disagrees, get a second contractor’s opinion. Two independent assessments that agree on hail damage are strong evidence for a re-inspection. Request a re-inspection with the second contractor present. A public adjuster, who works for you, not the insurance company, can be hired on contingency for 10% to 15% of the final claim payment. The public adjuster is the escalation. The escalation is appropriate when the adjuster and the contractor disagree significantly and the re-inspection is denied.
Frequently Asked Questions
How do I file a hail damage insurance claim correctly?
First, document the damage with photos, hailstones, soft-metal dents, roof slopes from the ground. Second, call a roofing contractor for a professional inspection and written report. Third, call the insurance company to file the claim. Fourth, be present with your contractor during the adjuster’s inspection. Fifth, compare the adjuster’s estimate with your contractor’s and request a supplement if needed. The order matters. The contractor comes before the insurance call.
What does homeowners insurance cover for hail damage to a roof?
Homeowners insurance covers hail damage to the roof, gutters, siding, windows, and any other exterior surface struck by hail. The coverage is subject to the policy’s wind and hail deductible, typically 1% to 2% of the home’s insured value. A home insured for $300,000 with a 2% deductible has a $6,000 deductible for hail claims. The insurance covers the amount above the deductible up to the policy limits.
Will my insurance rates increase after filing a hail damage claim?
A single hail claim typically does not increase rates individually, hail is classified as an act of nature and is not a rating factor the way at-fault accidents are in auto insurance. However, multiple claims over a short period or a catastrophic hail event that affects an entire region may result in rate increases or non-renewal for all policyholders in that region. The risk is pooled. The pool is the region. The claim history is the region’s, not yours individually.
How long do I have to file a hail damage claim after a storm?
File the claim within 30 days of the storm. Most policies require prompt notification of damage. Document everything within 48 hours, the hailstones, the soft-metal dents, the roof damage. The longer the delay, the harder it is to prove the hail caused the damage rather than normal wear and tear. The prompt filing links the damage to the storm. The link is the evidence. The evidence degrades with time.
Should I get multiple contractor estimates for a hail claim?
Get at least two estimates from reputable, local roofing contractors who have experience with insurance claims. The estimates should be line-item, materials, labor, permits, disposal. Compare them to the adjuster’s estimate. The multiple estimates validate each other and demonstrate that the contractor’s pricing is within market norms. The validation supports the supplement request if the adjuster’s estimate is lower.
What if my hail damage claim is denied by the insurance company?
Request the denial in writing with specific reasons. Get a second contractor’s opinion. If the second contractor also identifies hail damage, request a re-inspection with the second contractor present. If the re-inspection is denied or the denial is upheld, hire a public adjuster on contingency, 10% to 15% of the final payment. The public adjuster works for you. The public adjuster is the escalation. The escalation is the path when the evidence is strong and the denial is not supported.
The Claim That Pays for the Roof
Document within 48 hours: hailstone photos with a coin, soft-metal dents, roof photos from the ground, granule samples from the gutters. Call a roofing contractor for a professional inspection and a written report. Call the insurance company to file the claim. Have the contractor present during the adjuster’s inspection. Compare the adjuster’s estimate to the contractor’s estimate. Request a supplement for any legitimate line items the adjuster omitted. If denied, get a second opinion, request a re-inspection, and escalate to a public adjuster if necessary. The process is sequential. The sequence is important. The contractor is the first call. The insurance company is the third call. The documentation is the first step. The claim is the result of the documentation. The documentation is the evidence. The evidence determines the outcome. The outcome is a roof replacement paid for by the insurance company. The alternative, a roof replacement paid for by you, costs $9,000 to $15,000. The difference between the insurance paying and you paying is the quality of your documentation. The documentation is free. The roof is not. The documentation is the work you do in the 48 hours after the storm. The work is the difference. The difference is $12,000. The work is worth the difference. Ever stood in your driveway the morning after a hail storm, watching the sun melt the last hailstones into puddles, and thought “I should take a picture of those before they’re gone”? That thought was the claim. That thought was the $12,000. The photo of the hailstone next to a quarter, taken at 7 a.m. on the morning after the storm, was the evidence that the adjuster used to approve the claim three weeks later. The photo took 10 seconds. The photo was worth $12,000. The neighbor who did not take the photo — who went back inside and thought “I’ll deal with it later” — had his claim denied because there was no evidence that the hail at his address was large enough to damage shingles. His roof was damaged. His shingles were bruised. He had no photo. The evidence was missing. The claim was denied. The photo was the difference. The photo was free. The roof was $12,000. The photo was worth $12,000. The neighbor paid for his roof. The photo paid for yours. Take the photo.