Replacing a bathroom light fixture takes 30 to 60 minutes and requires no plumbing, no drywall work, and no electrical modifications beyond connecting three wires. The hard part is choosing a fixture that fits the existing junction box, looks right above the mirror, and is rated for use in a damp location. The wiring is the easy part.
A bathroom is a damp location under the National Electrical Code. The fixture you install must be rated for damp or wet locations. A fixture rated for dry locations only cannot be installed where it may be exposed to steam and moisture. The rating is printed on the fixture label and on the box. Here is how to choose the right fixture, remove the old one, and install the new one safely.
Choosing a Bathroom Fixture That Fits
The new fixture must be rated for damp or wet locations. This is non-negotiable. A damp-location rating covers fixtures installed indoors where they may be exposed to moisture but not direct water spray, which describes a bathroom vanity light. A wet-location rating covers fixtures exposed to direct water spray, which applies to fixtures inside a shower enclosure. Most bathroom vanity lights are damp-rated. If the fixture box does not say damp location or wet location, it is dry-rated only and cannot be installed in a bathroom.
The new fixture must cover the existing junction box. The junction box is the metal or plastic box recessed into the wall behind the current fixture. The new fixture’s backplate, also called the canopy, must be large enough to cover the box opening completely. Measure the junction box before buying the fixture. A standard round junction box is 4 inches in diameter. A standard rectangular box is 4 inches wide. A fixture with a backplate smaller than the box leaves a gap that is a code violation and an eyesore. If the box is in an awkward location, you can install a ceiling medallion or a decorative backplate behind the fixture to cover gaps.
The fixture must be positioned correctly above the mirror. Standard height for a vanity light above a mirror is 75 to 80 inches from the floor to the center of the fixture. If the fixture is mounted on the mirror surface or on the wall above the mirror, the existing junction box determines the location unless you are willing to relocate the box, which is a separate project involving drywall repair. If the existing box is at an awkward height, consider a fixture with an adjustable arm or a longer backplate that provides some flexibility in mounting position.
Turn Off the Power and Verify It Is Off
Turn off the breaker that controls the bathroom lights. If you are unsure which breaker it is, turn on the light, then switch off breakers one at a time until the light goes out. Bathroom lights are often on a circuit shared with other bathrooms or with bedroom lighting. They are usually not on the bathroom receptacle circuit, which by code must be a dedicated 20-amp circuit serving only bathroom receptacles.
Verify the power is off with a non-contact voltage tester. Touch the tester to each wire inside the junction box after removing the old fixture. The tester should not beep or light up. Test the tester on a known live circuit before and after to confirm it is working. A tester with a dead battery gives a false negative. Test on a live outlet, test the wires in the box, test on the live outlet again. All three readings must be consistent. Live outlet beeps. Box does not beep. Live outlet beeps again. You now know with certainty that the circuit is dead.
Remove the Old Fixture
Remove the light bulbs and any glass shades or globes from the old fixture. Set them aside. They are fragile and will break if the fixture shifts while you are working on the wiring.
Remove the screws or cap nuts that hold the fixture to the mounting bracket or to the junction box. Support the fixture with one hand while removing the last screw. The fixture will drop when the last fastener is removed. Most bathroom vanity lights are surprisingly heavy. A three-bulb or four-bulb fixture with glass shades can weigh 10 to 15 pounds. Do not let it hang by the wiring.
Disconnect the wiring. There are three wires: black hot, white neutral, and bare or green ground. Untwist the wire nuts and separate the wires. If the wires are connected with push-in connectors, cut the wires as close to the connector as possible and strip fresh wire for the new fixture. The old fixture is now free. Set it aside.
Inspect the Junction Box and Wiring
Look at the junction box. It must be securely attached to the framing. A loose box must be tightened or replaced before installing a new fixture. A box that moves when you pull on it will not support a new fixture safely.
Look at the condition of the wires. The insulation should be intact with no cracks, brittleness, or exposed copper. If the wiring is old cloth-covered wire from before the 1960s, the insulation may be fragile. Handle it carefully. The cloth covering may crumble when you touch it. If the wiring is in poor condition, stop and call an electrician. You cannot safely connect a new fixture to wiring that is falling apart. The junction box may need to be rewired from the attic or from an adjacent outlet, which is a job for a professional.
Look at the wire length. There should be at least 6 inches of wire extending from the box, and at least 3 inches extending beyond the front edge of the box. If the wires are too short, you can extend them with wire nuts and short pigtails. If the wire is so short that even a pigtail connection is difficult, stop and call an electrician. Short wires in a junction box are a sign of previous work that cut corners. The box may need to be opened from the wall to extend the wiring properly.
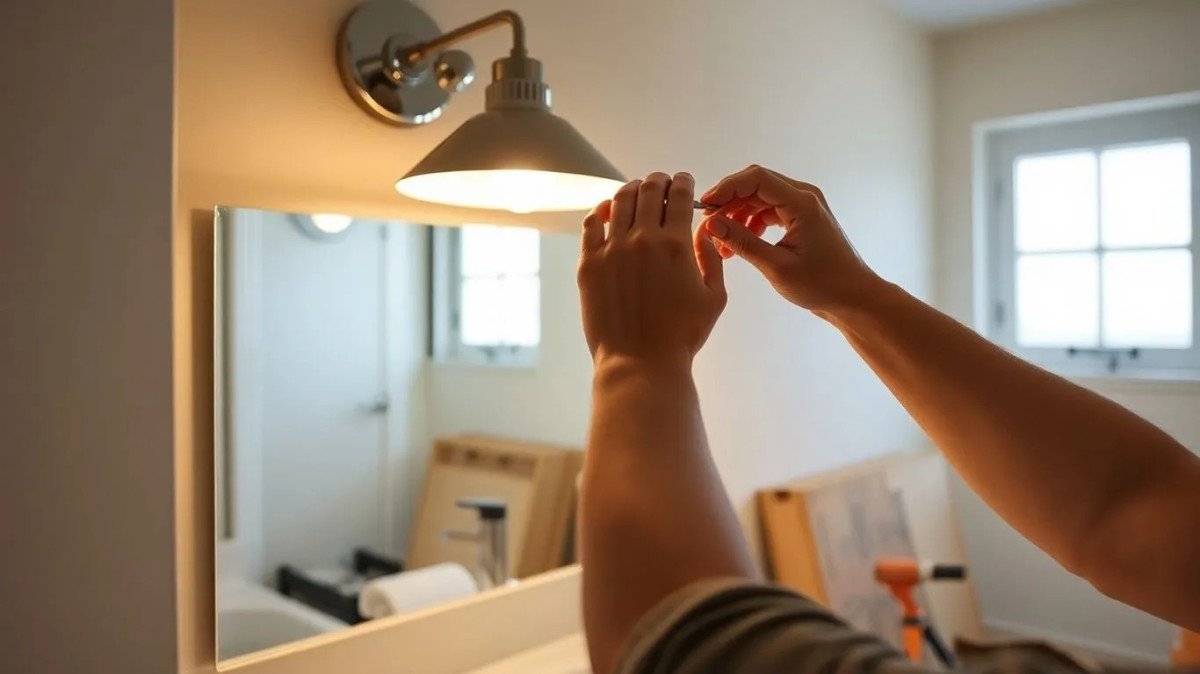
Install the New Fixture
The new fixture comes with a mounting bracket. Attach the bracket to the junction box using the screws provided. The bracket typically has a slot or a threaded hole in the center that accepts a nipple or mounting screws. The bracket must be oriented correctly. Some brackets are universal. Others are specific to the fixture orientation. Read the instructions. Do not assume the bracket works in any position.
Connect the wiring. Black to black, white to white, ground wire to the green ground screw on the mounting bracket or to the bare copper ground wire from the box. If the junction box does not have a ground wire, the box itself may be metal and grounded through the conduit or armored cable. In that case, attach the fixture ground wire to the ground screw on the box. Use wire nuts sized for the number of wires being connected. A yellow wire nut handles two or three 14-gauge wires. A red wire nut handles two or three 12-gauge wires. Twist the wires together with pliers before screwing on the wire nut. The wire nut covers the mechanical connection. The twist provides it.
Tuck the wires into the junction box carefully. The wires should fold into the box without being pinched or forced. If the box is small and the wires are difficult to tuck, trim the fixture wires to a reasonable length. Do not trim the house wires, as those may already be short. Leave enough slack in the fixture wires to remove the fixture for bulb changes or future repairs without pulling the wire nuts apart.
Mount the fixture to the bracket. Align the fixture backplate over the mounting screws or thread it onto the nipple. Tighten the cap nuts or the fixture screw until the backplate is snug against the wall with no gap. Do not overtighten. A metal backplate overtightened against drywall will dent the drywall. A glass backplate overtightened will crack.
Install the bulbs. Use LED bulbs rated for damp locations. The bulb package says suitable for damp locations or suitable for use in bathrooms. Standard LED bulbs are fine for bathroom vanity lights that are not inside the shower enclosure. The wattage must not exceed the maximum marked on the fixture socket. A fixture rated for 60-watt maximum per socket can accept any LED bulb because LED bulbs draw far less than 60 watts.
Install the glass shades or globes. Hand-tighten the retaining screws or threaded rings. Overtightening cracks the glass. Snug is sufficient. The shade will not vibrate loose. It is not a lug nut.
Turn the breaker back on. Test the light. If it does not turn on, turn the breaker off and check that the wire connections are tight and the bulbs are properly seated. The most common reason a new fixture does not work is that the wire nut connection for the hot or neutral wire is loose and the wire has pulled free while tucking the wires into the box.
Special Cases: Medicine Cabinet Lights and Shower Lights
A medicine cabinet with a built-in light may be hardwired or plug into a receptacle inside the cabinet. If it plugs in, the replacement is simple. Unplug the old cabinet, remove it from the wall, mount the new cabinet, and plug it in. No wiring is required. If it is hardwired, the same process applies as for a vanity light. The junction box is typically inside the wall behind the medicine cabinet. Turn off the power, disconnect the old wiring, connect the new wiring, and mount the cabinet.
A light inside a shower enclosure or directly above a bathtub must be rated for wet locations and must be connected to a GFCI-protected circuit. Most bathroom lighting circuits are not GFCI-protected because the code does not require GFCI protection for ceiling-mounted lights. If you are installing a light in a wet location, verify that the circuit has GFCI protection, either at the breaker or from an upstream GFCI receptacle. If it does not, an electrician must add GFCI protection. Do not install a light in a shower without it.
Frequently Asked Questions
My old fixture was mounted directly to the wall with no junction box. Can I do the same with the new one?
No. Every light fixture must be mounted to a junction box. The box contains the wire connections, protects them from damage, and provides fire-rated separation from the wall cavity. If the old fixture was screwed directly into the drywall with wires hanging out of a hole, the previous installer violated the electrical code. Install an old-work junction box in the wall before mounting the new fixture. Cut a hole sized for the box, feed the wires into the box, and clamp the box to the drywall. The box costs $5 to $10 and takes 15 minutes to install.
My new fixture is heavier than the old one. How do I make sure it stays on the wall?
The junction box, not the drywall, supports the fixture. A standard plastic junction box nailed to a stud is rated for fixtures up to 50 pounds. If the new fixture weighs more than 50 pounds, which is rare for a bathroom vanity light, the junction box must be rated for the heavier weight. Heavy-duty boxes are mounted with additional screws into the framing. For fixtures over 50 pounds, the fixture itself must be independently supported from the framing, not from the junction box. This is uncommon for bathroom lights. A vanity light with three or four bulbs typically weighs 10 to 20 pounds, well within the rating of a standard box.
I want to replace one vanity light with two sconces. How do I wire the second one?
This requires adding a new junction box and running wiring from the existing box to the new location. The wiring runs behind the drywall, which means cutting into the wall and patching it after the wire is run. This is a larger project than a simple fixture replacement. If the wall is open during a bathroom remodel, adding the second box is straightforward. If the wall is finished, the drywall repair may be more work than the electrical work. Consider hiring an electrician if the wiring path is not accessible from an attic or basement.