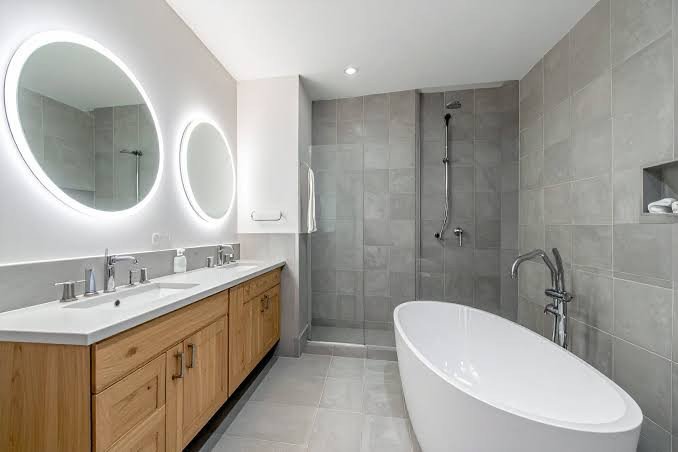
According to property management in Aurora, this guide covers the best waterproofing ideas for small bathrooms — five strategies ranked by impact. The best waterproofing idea for a small bathroom is to treat the entire room as a wet zone, not just the shower. In a small bathroom — 5 by 8 feet or less — water from the shower splashes onto the floor, steam condenses on the walls, and the toilet and vanity are never more than a few feet from the spray zone. The shower enclosure keeps most of the water in. It does not keep all of it in. The room outside the shower gets wet every time someone uses it. Waterproofing only the shower in a small bathroom is like waterproofing only the deep end of a swimming pool. The water finds the unprotected areas. The damage accumulates.
Waterproofing a small bathroom costs $500 to $3,000 for the materials and labor, depending on the scope — whether you are waterproofing just the shower, the shower and the floor, or the entire room from floor to ceiling. The cost is modest compared to the cost of water damage behind the walls and under the floor. Here are the most effective waterproofing strategies for small bathrooms, ranked by impact.
Idea 1: Waterproof the Entire Bathroom Floor
A waterproof membrane under the bathroom floor tile is the single most important waterproofing upgrade for a small bathroom. In a large bathroom, water that escapes the shower lands on the floor and evaporates before it causes damage. In a small bathroom, the same amount of water lands on a smaller floor area that is closer to the walls and the vanity. The water pools against the baseboards, seeps under the flooring, and saturates the subfloor around the toilet and the vanity. A waterproof membrane — a sheet membrane like Schluter Ditra or a liquid-applied membrane like RedGard — installed under the floor tile costs $3 to $6 per square foot for materials and installation, or $120 to $240 for a 40-square-foot bathroom floor. The membrane prevents water from reaching the subfloor. The tile is the wear surface. The membrane is the waterproofing. The two are separate and both are necessary.
A waterproof membrane under the floor also protects the ceiling below. A small bathroom on the second floor that leaks through the floor into the kitchen below is a five-figure repair. The ceiling drywall must be replaced. The kitchen cabinets may be water-damaged. The subfloor may be rotted. The waterproof membrane under the bathroom tile prevents all of that for $200. The math is not complicated. The membrane is invisible under the tile. The water damage that it prevents is extremely visible through the kitchen ceiling. The membrane costs $200. The ceiling repair costs $2,000. Choose the membrane.
Idea 2: Waterproof the Shower from Floor to Ceiling
In a small bathroom, the shower is typically 12 to 24 inches from the vanity and the toilet. Steam and overspray from the shower head reach every surface in the room. Waterproofing the shower walls to the ceiling, not just to the shower head height, prevents moisture from penetrating the drywall or plaster above the tile line and condensing in the wall cavity. Standard shower waterproofing extends 6 feet above the shower floor. In a small bathroom, extend it to the ceiling. The additional cost is $50 to $100 in membrane material and an hour of labor. The benefit is a shower enclosure that is completely waterproof from the pan to the ceiling, with no vulnerable drywall seam at the top of the tile.
A pre-sloped shower pan with a waterproof membrane, either a PVC liner with a mortar bed on top or a bonded membrane system like Schluter Kerdi, costs $500 to $1,500 installed and is the foundation of a waterproof shower. The pan must slope 1/4 inch per foot toward the drain. The waterproof membrane must extend up the walls at least 6 inches above the finished curb height. The corners, where the pan meets the walls, must be folded, not cut. A cut corner will leak. The waterproofing at the corners is the difference between a shower that stays dry for 30 years and a shower that leaks into the wall framing within 3 years. The corners are the test. The installer’s skill at the corners is the grade.
The National Association of Home Builders (NAHB) identifies shower pan and waterproofing failures as one of the most common and costly sources of water damage in residential construction. The cost of a properly installed waterproof membrane is a fraction of the cost of the demolition, mold remediation, and reconstruction that follows a failed membrane. The waterproofing is the cheapest component of the shower. It is also the most important.
Idea 3: Install a Curbless Shower with a Linear Drain
A curbless shower, no threshold to step over, eliminates the curb that separates the shower floor from the bathroom floor. The entire bathroom floor slopes gently toward a linear drain at the shower end. Water that splashes outside the shower spray zone drains back toward the drain instead of pooling against the baseboards. A curbless shower requires waterproofing the entire bathroom floor, not just the shower area, because the whole floor is part of the drainage plane. The waterproofing cost is higher. The accessibility is better. The water management is better. A curbless shower in a small bathroom makes the room feel larger because the floor is continuous with no visual break at the shower threshold.
A curbless shower costs $2,000 to $5,000 more than a standard shower with a curb, due to the additional waterproofing, the linear drain, $300 to $800 for the drain alone, and the floor slope that must be built into the substrate. The bathroom floor must be recessed or the rest of the floor must be raised on a mortar bed to create the slope to the drain. The structural modification is the expensive part. The waterproofing is the same membrane, just applied over a larger area.
Idea 4: Use Waterproof Wall Panels Instead of Drywall
Standard drywall, even moisture-resistant green board or purple board, is not waterproof. It resists moisture better than standard drywall. It will eventually fail if subjected to repeated wetting from shower overspray. In a small bathroom where the walls outside the shower are frequently wet, replace the drywall with a waterproof wall panel system. Cement backer board with a waterproof membrane and tile is the gold standard, completely waterproof, completely durable, and expensive at $12 to $25 per square foot installed. PVC wall panels, interlocking tongue-and-groove panels that look like tile or stone, cost $8 to $15 per square foot installed and are 100% waterproof with no grout lines to maintain. Acrylic wall panels cost $6 to $12 per square foot installed and are the budget option, waterproof, seamless, and visibly not tile.
The wall behind the toilet and the vanity is the most frequently damaged area in a small bathroom. Shower overspray and steam condense on these surfaces. The drywall absorbs the moisture. The paint bubbles. The drywall softens. The baseboard swells and separates from the wall. A waterproof wall panel in these areas eliminates the damage. The panel costs $200 to $500 for materials. The drywall replacement and repainting that it prevents costs the same amount every 5 to 8 years. The panel pays for itself the first time it prevents a repaint.
Idea 5: Upgrade the Bathroom Exhaust Fan
A properly sized and properly vented exhaust fan is the most important waterproofing device in a bathroom, and it does not involve a single drop of sealant or membrane. It removes moisture from the air before it condenses on the walls and the ceiling. A small bathroom needs a fan rated at 1 CFM per square foot of floor space, a 40-square-foot bathroom needs a 40 CFM fan minimum, and 50 to 80 CFM is better. The fan must be vented to the exterior through a dedicated duct, not into the attic, not into the soffit, not into the space between the ceiling joists. A fan that vents into the attic deposits moisture directly onto the insulation and the roof sheathing, causing the same damage it was installed to prevent, just in a different location.
A bathroom exhaust fan with a humidity sensor costs $100 to $250 for the fan and $200 to $500 installed. The humidity sensor turns the fan on automatically when moisture levels rise and turns it off when the room is dry. The fan runs when it needs to run, not when someone remembers to flip the switch. In a small bathroom, the humidity sensor is the difference between a fan that runs every time someone showers and a fan that runs when someone remembers. The sensor remembers. The occupant does not.
Frequently Asked Questions
What is the best way to waterproof a small bathroom?
The best approach is to waterproof the entire floor with a membrane under the tile, extend the shower waterproofing to the ceiling, replace vulnerable drywall sections with waterproof panels, and install a humidity-sensing exhaust fan. Treat the entire room as a wet zone. The cost is $1,500 to $5,000 depending on the scope. The alternative is water damage behind the walls and under the floor.
Do I need to waterproof the bathroom floor outside the shower?
In a small bathroom, yes. Water from the shower splashes onto the bathroom floor. A waterproof membrane under the floor tile costs $3 to $6 per square foot, $120 to $240 for a typical small bathroom, and prevents water from reaching the subfloor. The membrane is invisible. The subfloor damage it prevents is not.
What is the difference between water-resistant and waterproof drywall?
Water-resistant drywall, green board or purple board, resists moisture better than standard drywall but is not waterproof. It will eventually fail if subjected to repeated wetting. Waterproof materials, cement backer board with a membrane, PVC panels, acrylic panels, do not absorb water and will not fail from moisture exposure. In a small bathroom where walls outside the shower are frequently wet, waterproof panels are the correct choice.
How much does a curbless shower cost in a small bathroom?
A curbless shower costs $2,000 to $5,000 more than a standard shower with a curb, due to the additional waterproofing, the linear drain, and the floor slope that must be built into the substrate. The total cost of a curbless shower in a small bathroom is $8,000 to $15,000 including tile, waterproofing, glass door, and plumbing fixtures.
Can I waterproof a bathroom myself?
Applying a liquid waterproof membrane to the floor before tiling is moderately DIY-friendly, the material is rolled or troweled on like paint. Installing a sheet membrane or waterproofing a shower pan requires experience to get the corners and the drain connection right. A DIY shower waterproofing failure leaks into the wall and floor for years before the damage is visible. The cost of professional waterproofing is less than the cost of the damage from a failed DIY attempt.
Does a bathroom exhaust fan count as waterproofing?
Yes. A properly sized exhaust fan vented to the exterior removes moisture from the air before it condenses on surfaces. In a small bathroom, the fan is the primary defense against moisture damage outside the shower. A fan with a humidity sensor turns on automatically and runs until the room is dry. The fan costs $300 to $700 installed. The moisture damage it prevents costs thousands.
The Bathroom That Stays Dry
A small bathroom with a waterproof membrane under the floor tile, a shower waterproofed from pan to ceiling, waterproof wall panels behind the toilet and vanity, and a humidity-sensing exhaust fan costs $1,500 to $5,000 to waterproof and will remain free of water damage for 20 to 30 years. The waterproofing is invisible. The occupant never sees it. The occupant only sees the tile, the grout, the paint on the walls, and the ceiling that stays white instead of developing water stains around the exhaust fan.
The waterproofing is the cheapest component of the bathroom and the most important. The tile can be replaced. The vanity can be refinished. The waterproofing is entombed behind the tile for the life of the bathroom. Spend the money on the membrane. The tile will look good. The membrane must work. The tile is decorative. The membrane is structural. Decorate the bathroom. Structure the waterproofing. In that order. Ever pulled up a bath mat in a small bathroom and found the floor underneath slightly swollen, the grout cracked, the baseboard separating from the wall? That is water that escaped the shower six months ago. It has been soaking into the subfloor ever since. The bath mat hid the damage. The damage continued underneath it. The waterproof membrane that should have been under the tile was never installed. The tile looked fine. The subfloor did not. The tile is decorative. The membrane is structural. The bath mat is a witness.