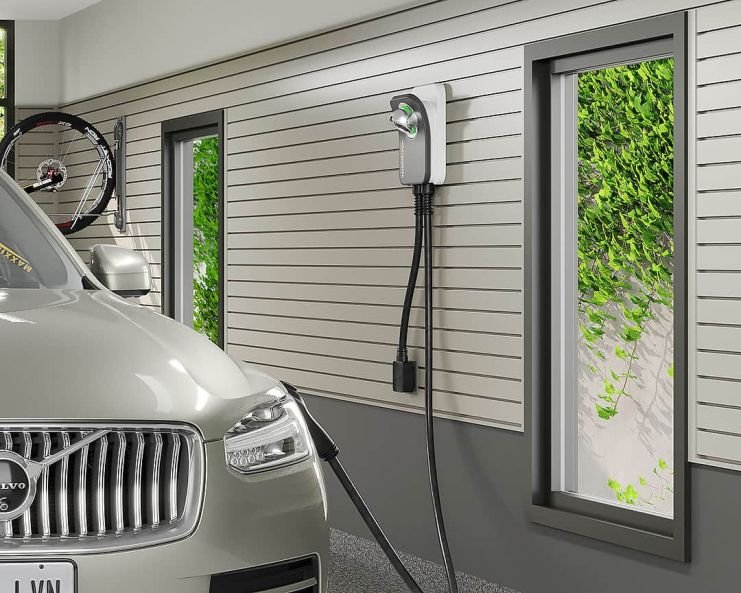
The best location for a home EV charger is on the wall of the garage closest to the electrical panel and closest to the car’s charging port. The closer the charger is to the panel, the shorter the wiring run. The shorter the wiring run, the lower the installation cost. A charger installed on the wall directly next to the electrical panel costs $500 to $800 to install — one to two hours of labor, 5 to 10 feet of wire, and a circuit breaker. A charger installed on the opposite side of the garage costs $1,200 to $2,500 — four to eight hours of labor, 50 to 100 feet of wire run through conduit, and possibly through finished walls. The location determines the cost. The panel proximity is the cost driver. Every foot of wire between the panel and the charger costs $8 to $15 in materials and labor. Fifty feet of wire costs $400 to $750. Five feet costs $40 to $75. The difference is the distance. The distance is the location. Choose the location closest to the panel that also reaches the car’s charging port.
The second consideration is the charging cable length. A Level 2 charger comes with a charging cable that is 18 to 25 feet long. The cable must reach the car’s charging port when the car is parked in its normal position. The cable should not be stretched to its limit — leave 2 to 3 feet of slack. The cable should not lay across a walking path — a tripping hazard and a cable that will be stepped on, driven over, and damaged. The cable should hang from a retractable tool balancer mounted to the ceiling — the cable drops down to the car, plugs in, and retracts out of the way when not in use. The retractable balancer costs $30 to $80 and eliminates the cable from the floor. The cable on the floor is the trip hazard. The cable on the ceiling is the solution. The solution costs $50. The trip costs a broken charger cable, $200 to $300 to replace. The solution is cheaper than the replacement cable.
Garage Installation, the Default Best Location
The garage is the best location for a home EV charger for three reasons: it is closest to the electrical panel in most homes, the panel is typically in the garage or on an interior wall adjacent to the garage, it is protected from weather, and the car is already parked there. A charger installed in the garage operates in a controlled environment, no rain, no snow, no direct sun, no ice. The charger lasts longer. The connections stay dry. The user stays dry while plugging in. The garage is the default. The default is the right choice for most homes.
The ideal garage charger placement is on the side wall, not the back wall. The side wall places the charger at the midpoint of the car’s length. The charging cable can reach either the front or the rear charging port, some EVs charge at the front fender, others at the rear. The side wall placement accommodates both. The charger mounted at the midpoint of the car’s length provides the most flexibility. The flexibility is future-proofing. The current EV charges at the driver’s side front fender. The next EV may charge at the passenger’s side rear. The side wall placement at the midpoint reaches both. The midpoint is the strategy. The strategy is the location that works for every EV. The location that works for one EV is the current solution. The location that works for every EV is the permanent solution. The permanent solution is the side wall at the midpoint.
The U.S. Department of Energy provides guidance on residential EV charger installation, noting that proximity to the electrical panel is the primary factor influencing installation cost. The DOE recommends planning the charger location to minimize the wiring run while ensuring the charging cable reaches the vehicle’s charge port on the side where it is most convenient to park.
Exterior Installation, When the Garage Is Not an Option
An exterior EV charger, mounted on an exterior wall, on a post near the driveway, or under a carport, is the option when the garage is too small, the garage is used for storage, the car is parked in the driveway, or there is no garage. An exterior charger must be rated for outdoor use, NEMA 3R or NEMA 4 enclosure rating indicates weather resistance. The charger must be hardwired, not plugged into an outlet, for an exterior installation. A hardwired connection eliminates the outlet as a failure point. The outlet outdoors is exposed to rain, snow, and ice. The GFCI breaker required for outdoor outlets is prone to nuisance tripping with EV chargers. The hardwired connection eliminates both problems. The hardwired connection is the correct installation method for an exterior charger.
An exterior charger mounted on a post near the driveway, rather than on the exterior wall of the house, costs $500 to $1,000 more than a wall-mounted exterior charger. The post requires a concrete footing, buried conduit from the house to the post, and a longer wiring run. The post is the solution when the driveway is far from the house. The post is the premium installation. The premium is the post and the underground conduit. The premium is the cost of bringing the charger to the car. The car is in the driveway. The driveway is far from the house. The post brings the charger to the car. The car does not come to the house. The car stays where it is parked. The post is the bridge. The post costs $1,000. The bridge is the difference between a charger that reaches the car and a charger that does not.
Two-Car Households, One Charger or Two?
A single charger mounted on the ceiling or on a post between two parking spaces can charge both EVs if the charging cable is long enough to reach both cars. A 25-foot cable can typically reach two cars parked side by side if the charger is mounted between them. The single charger costs $2,000 to $3,000 installed. Two chargers cost $3,000 to $5,000. The single charger is the cost-efficient solution if both cars are not driven to empty every day and can alternate charging nights. One car charges Monday, Wednesday, Friday. The other charges Tuesday, Thursday, Saturday. The single charger supports both. The single charger is the budget. The dual charger is the convenience. The convenience is the ability to charge both cars simultaneously. The cost of the convenience is the second charger, $1,000 to $2,500 installed. The convenience is worth the cost if both cars are driven daily or if the charging schedule coordination is a source of conflict. The conflict is the argument over whose turn it is to charge. The second charger eliminates the argument. The elimination is worth the $1,500 to some households and not to others. The argument frequency determines the value. The frequency is the number of times per month someone has to move a car. The value is the $1,500 divided by the monthly arguments. If the arguments exceed the frustration threshold, the second charger is the solution. The solution is the elimination of the argument. The elimination is permanent.
Frequently Asked Questions
Where is the best place to install an EV charger in a home?
The garage side wall, at the midpoint of the car’s length, closest to the electrical panel. This placement minimizes the wiring run cost, keeps the charger out of the weather, and allows the charging cable to reach the car’s charging port whether it is on the front or the rear. The closer the charger is to the panel, the lower the installation cost.
How much does EV charger installation cost?
EV charger installation costs $500 to $2,500 depending on the distance from the electrical panel. A charger next to the panel costs $500 to $800. A charger 50 feet from the panel costs $1,200 to $2,000. A charger on a post 100 feet from the panel costs $2,000 to $3,500. The cost includes the circuit breaker, the wire, the conduit, the labor, and the permit. The charger itself costs $400 to $700 additional.
Can I install an EV charger outside in the driveway?
Yes, using a charger rated for outdoor use with a NEMA 3R or NEMA 4 enclosure, hardwired to the electrical circuit, not plugged into an outlet. Mount the charger on an exterior wall, under an eave if possible, or on a post near the driveway. The post installation costs $500 to $1,000 more than a wall-mounted exterior charger due to the post, the concrete footing, and the underground conduit.
What size circuit breaker do I need for an EV charger?
A 50-amp circuit breaker is standard for a Level 2 charger delivering 40 amps, the maximum continuous load of 80% of the circuit rating. A 60-amp breaker supports a 48-amp charger, faster charging, higher installation cost. The breaker size determines the charging speed. The electrician sizes the breaker and the wire based on the charger’s amperage rating. The electrician performs the load calculation to confirm the existing panel can support the additional load.
Do I need an electrical panel upgrade to install an EV charger?
A 200-amp panel can almost always support a Level 2 charger without an upgrade. A 100-amp panel may require an upgrade, $1,500 to $3,500, if the load calculation shows the existing panel is at capacity. The electrician performs the load calculation. The calculation determines whether an upgrade is needed. The calculation is the answer.
How long should the EV charging cable be to reach the car?
A charging cable should be 2 to 3 feet longer than the distance from the charger to the car’s charging port when the car is in its normal parked position. Most Level 2 chargers come with an 18- to 25-foot cable. Measure the distance before choosing the charger location. The cable should not be stretched to its limit. The slack prevents strain on the connector. The slack allows the car to be parked a few feet off from its normal position. The slack is the margin. The margin is the flexibility. The flexibility is the difference between a cable that reaches every time and a cable that reaches only when the car is parked perfectly.
The Location That Determines the Cost
The garage side wall, at the midpoint of the car’s length, as close to the electrical panel as the car’s charging port allows. The 18- to 25-foot cable reaches the port with 2 to 3 feet of slack. The cable hangs from a retractable balancer on the ceiling, off the floor, out of the walkway, out of the way. The installation costs $500 to $800 if the panel is nearby, $1,200 to $2,500 if the panel is far. The location determines the cost. The panel proximity is the cost driver. The cost is the wiring. The wiring is the distance between the panel and the charger. The distance is the decision. The decision is the charger location. Choose the location closest to the panel that also reaches the car’s charging port. The car is parked in the same spot every night. The charger should be where the car is parked. The panel is where the power comes in. The location is the line between the panel and the car. The shortest line is the cheapest line. The cheapest line is the best line. The best line is the one that costs $500 instead of $2,000. The $1,500 savings is the cost of choosing the right location. The right location is the garage side wall next to the panel. The wrong location is the back wall on the opposite side of the garage. The distance is 50 feet of wire. The cost is $1,500. The decision is the location. The location is made before the electrician arrives. The electrician arrives and wires the location. The location is yours to choose. Choose the one that costs $500. Ever parked your EV in the garage, walked to the charger port, and realized the cable was 6 inches too short — the charger was on the back wall, the car was parked nose-in, and the port was on the opposite side? The cable did not reach. The car had to be repositioned. The repositioning happened every night. The charger was in the wrong place. The wrong place was chosen because the charger location was not measured against the car. The charger was installed where it looked right. The cable was 20 feet long. The distance from the wall to the port was 22 feet. The 2 feet of missing cable cost 30 seconds of repositioning every night for the next 10 years. That is 1,825 minutes of repositioning — 30 hours of moving the car an extra two feet. The charger should have been on the side wall. The side wall would have cost the same. The side wall would have saved 30 hours. The 30 hours are the cost of not measuring. The measurement takes 2 minutes. The 30 hours are the return on the 2 minutes. Measure before the electrician arrives.