The toilet bowl is fine. The porcelain is intact, the trap is clear, and the wax seal is holding. The tank is the problem. It has a hairline crack that weeps a tablespoon of water onto the floor every time you flush, or the original tank from 1987 has rusted bolts that have fused to the porcelain, or you are upgrading to a modern tank with a dual-flush mechanism and a lower gallons-per-flush rating. Replacing just the tank, without replacing the entire toilet, costs between fifty and a hundred and fifty dollars for the tank itself and about an hour of work. The entire job is two bolts, one gasket, and one water supply connection. The only way to get it wrong is to overtighten the bolts and crack the porcelain.
Toilet tanks are generally interchangeable only with the same brand and model of bowl. A Kohler tank fits a Kohler bowl of the same model line. It does not fit an American Standard bowl. The bolt pattern, the gasket shape, and the flush valve opening all vary between manufacturers. If you do not know the brand and model of your toilet, look inside the tank for a stamp or a label, or take a photo of the toilet and show it to the plumbing supply counter. Buying a universal replacement tank is a gamble that usually loses. Match the brand and model or replace the entire toilet.
Shut Off the Water and Drain the Tank Completely
Turn the shut-off valve behind the toilet clockwise until it stops. If the valve has not been turned in years and resists, apply penetrating oil to the stem, wait five minutes, and try again with a gentle grip. Forcing a stuck shut-off valve can twist the copper supply line, and replacing a twisted supply line inside the wall is a substantially larger project than replacing a toilet tank. Flush the toilet and hold the handle down to drain as much water as possible from the tank. Sponge out the remaining water from the bottom of the tank. A cup or two of water will remain below the flush valve opening, and it will spill when you lift the tank off the bowl. Have a towel and a shallow pan ready.
Disconnect the flexible water supply line from the bottom of the fill valve on the left side of the tank. Use an adjustable wrench to hold the fill valve nut steady while you turn the supply line nut counterclockwise. If you twist the fill valve without bracing it, you can crack the plastic threads or rotate the entire fill valve assembly, which breaks the seal inside the tank. The supply line may contain residual water. Point it into the pan.
Remove the Old Tank — Two Bolts, Possibly Rusted, Potentially Stubborn
The tank is held to the bowl by two brass or stainless steel bolts that pass through holes in the bottom of the tank and through corresponding holes in the back of the bowl. The bolt heads are inside the tank, usually covered by small plastic caps or sitting in recessed areas under the flapper. The nuts and washers are underneath the bowl, accessible from below. If the bolts are rusted, the nut will not turn, and forcing it will spin the bolt head inside the tank, which scratches the porcelain and accomplishes nothing. Apply penetrating oil to the nut and the exposed threads underneath the bowl. Wait ten minutes. If the nut still will not turn, cut the bolt with a hacksaw blade or a reciprocating saw between the tank and the bowl. Cut carefully. The porcelain chips if the blade hits it.
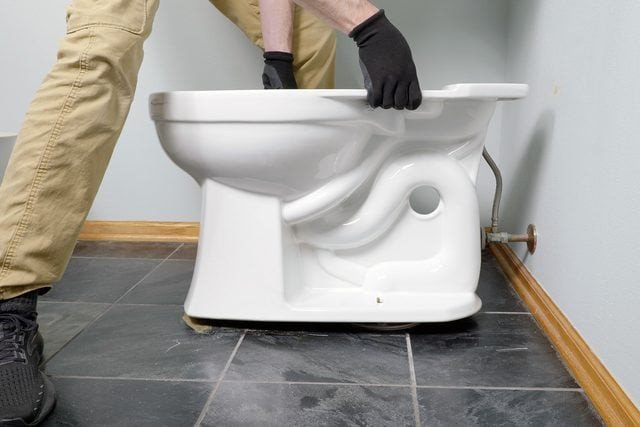
Once both nuts are removed or the bolts are cut, lift the tank straight up off the bowl. The tank weighs fifteen to twenty-five pounds empty and is awkward to grip. Lift with both hands, one on each side, and set the old tank aside on a towel on the floor. Do not set a porcelain tank directly on concrete or tile. It will crack. The large rubber gasket between the tank and the bowl, called the tank-to-bowl gasket or the spud gasket, will be stuck to either the tank or the bowl. Remove it and clean both mating surfaces with a rag. Old gasket residue prevents the new gasket from sealing.
Install the New Tank — Gasket First, Bolts Second, Tighten Gently
Place the new tank-to-bowl gasket onto the flush valve opening on the bottom of the new tank. The gasket should seat evenly around the opening with the beveled side facing the bowl if the gasket is directional. Insert the new tank bolts through the holes in the bottom of the tank from the inside, with the rubber washer under the bolt head inside the tank and the metal washer and nut on the threaded end underneath. The rubber washer goes on the inside, against the porcelain, to create the watertight seal. The metal washer goes on the outside, under the nut, to distribute the clamping force.
Lower the tank onto the bowl, aligning the bolts with the holes in the bowl and centering the gasket over the bowl’s inlet opening. The tank should sit flush on the bowl with no rocking. If the tank rocks, the gasket is not seated properly or the bowl surface is uneven. Tighten the nuts underneath the bowl by hand until they are snug, then tighten each nut an additional half turn with a wrench. Alternate between the two bolts, tightening each a quarter turn at a time, to keep the tank level and the gasket evenly compressed. The tank should be secure and should not move when you push gently on it. It should not be cranked down. Over-tightening the tank bolts is the number one cause of cracked toilet tanks. The gasket seals by compression, not by force. A quarter turn past hand-tight is almost always enough.
Reconnect the water supply line to the fill valve. Hand-tighten, then turn the supply line nut an additional quarter to half turn with a wrench while bracing the fill valve. Turn the shut-off valve on slowly and watch the tank fill. Check the tank-to-bowl connection and the supply line connection for drips. A drop that appears and then stops within a few seconds is normal as the gasket settles. A steady drip means a quarter turn more on the nut. A leak that will not stop means the gasket is pinched or misaligned, and you need to drain the tank, remove it, and reseat the gasket.
Set the water level in the new tank by adjusting the fill valve float. The water should stop about half an inch below the top of the overflow tube. Flush the toilet several times and check for leaks after each flush cycle. The tank-to-bowl gasket is under pressure only when the tank is full and the flush valve is closed, so a leak may not appear until the tank has been full for several minutes.
FAQ — Replacing a Toilet Tank
Can I replace just the tank with any universal tank from the hardware store?
No. Toilet tanks are not universal. The bolt pattern, the gasket shape and diameter, and the distance between the tank and the bowl mounting holes vary by manufacturer and by model. A universal replacement tank that claims to fit all toilets is marketing language that means it fits some toilets with included adapters and leaves the rest leaking. If you cannot find an exact replacement tank from the same manufacturer, replace the entire toilet. A complete toilet costs between a hundred and fifty and three hundred dollars and includes a factory-matched tank and bowl that are guaranteed to seal.
The tank bolts are not leaking, but water is seeping from between the tank and the bowl. What did I do wrong?
The tank-to-bowl gasket is not sealing. The most common causes are an improperly seated gasket, a gasket installed upside down if it is directional, a gasket that is the wrong size for the flush valve opening, or a tank that was tightened unevenly, compressing one side of the gasket more than the other. Drain the tank, remove it, inspect the gasket, and reinstall. A second common cause is a cracked tank flange, the porcelain ring around the bolt hole inside the tank, which allows water to travel down the bolt and drip from underneath the bowl. Tank bolt leaks and tank-to-bowl gasket leaks look similar from below but require different fixes.
When is it better to replace the whole toilet instead of just the tank?
Replace the whole toilet if the bowl is discolored, scratched, or has a worn-out glaze that stains easily; if the toilet is more than twenty years old and uses more than one point six gallons per flush; if the brand is obscure and finding a matching tank is impossible; or if the cost of a replacement tank is more than half the cost of a complete toilet. A new toilet installs in the same amount of time as a tank replacement, plus the time to replace the wax ring. The total job is under two hours either way, and the incremental cost of a complete toilet over a tank alone is often small enough that the upgrade is worth the labor savings of never having to deal with a cracked tank again.