You have been watching shower tile videos for weeks. The finished showers look beautiful: clean lines, perfectly spaced grout joints, a built-in niche for shampoo bottles, and floor tile that slopes precisely toward the drain. You are ready to start your own shower tile project. You should know that tiling a shower is the most technically demanding tile project in a home. A kitchen backsplash is forgiving because it never gets wet. A shower is unforgiving because it is wet every single day. As the TrueNest Management Miramar team notes, water that penetrates the tile installation destroys the framing behind it, and you will not know it is happening until the damage is extensive.
Tiling a shower takes a skilled DIY homeowner four to six weekends from start to finish. The physical tile installation is the fastest part. The surface preparation, waterproofing, layout planning, and curing times between steps consume most of the time. The materials cost $500 to $1,500 for a standard tub surround or a three-by-five-foot walk-in shower, depending on the tile you choose. Hiring a professional costs $3,000 to $8,000 for labor alone. The savings are real. The risk of doing it wrong is also real.
Materials and Tools You Need Before You Start
You cannot start tiling and then run to the store when you realize you are missing something. The thinset has a pot life of two to four hours once mixed. A trip to the hardware store in the middle of setting tile means the thinset in your bucket hardens and is wasted. Gather everything before you begin.
For the substrate, you need cement backer board or a foam backer board system. Cement backer board is heavy, dusty to cut, and requires a waterproof membrane applied over it. Foam backer board systems like Schluter Kerdi-Board or Wedi are lighter, easier to cut, and are inherently waterproof at the panel level, but they cost more. For waterproofing over cement board, use a liquid-applied membrane like RedGard or Hydro Ban, or a sheet membrane like Schluter Kerdi. The waterproofing layer is the most important part of the entire installation. Tile and grout are not waterproof. The waterproofing layer behind them is what keeps water out of your walls.
For tile setting, use a polymer-modified thinset mortar suitable for wet areas. The bag will say “polymer-modified” or “fortified” and will list shower walls and floors as approved applications. Do not use pre-mixed mastic or adhesive in a shower. Mastic re-emulsifies when it gets wet. It will fail. Use a cement-based thinset that you mix with water.
For grout, use a sanded grout for joints wider than one-eighth of an inch, or an unsanded grout for joints one-eighth of an inch or narrower. Epoxy grout is waterproof and stain-resistant but is difficult to work with and has a short working time. Cement-based grout is easier to apply but must be sealed after curing. For a first shower tile project, use cement-based grout and apply a penetrating grout sealer after the grout has cured.
Tools include a tile saw or a wet saw, a notched trowel with quarter-inch by quarter-inch notches for wall tile, a margin trowel for mixing and scooping, a grout float, a level, spacers, a mixing paddle and drill, buckets, sponges, and a rubber mallet. Rent a wet saw from a tool rental store if you do not own one. A manual snap cutter works for straight cuts on ceramic tile but cannot cut porcelain, stone, or notches. A wet saw cuts everything.
Surface Preparation and Waterproofing
The surface you tile over must be flat, stable, and waterproof. If you are tiling over existing drywall in a shower, stop. Drywall is not an acceptable substrate for a shower. Remove it and install cement backer board or a foam backer board system. If the existing wall is cement backer board but was not waterproofed, you must apply a waterproof membrane over it before tiling. Tile installed directly over unwaterproofed cement board will eventually leak.
Install the backer board according to the manufacturer’s instructions. Screw it to the studs every six to eight inches. Tape the seams with alkali-resistant mesh tape embedded in thinset. Do not use drywall tape. It will degrade in the alkaline environment of the cement board and thinset. Apply the waterproofing membrane over the entire surface, including the seams, the corners, and the area around the valve and showerhead. Follow the manufacturer’s instructions for the number of coats and the drying time between coats. Do not rush the waterproofing. The thinset will bond to the waterproofing. The waterproofing bonds to the backer board. Every layer must be properly cured before the next layer is applied.
Install the shower pan if you are building a walk-in shower. A prefabricated shower pan is the simplest option. A mortared shower pan built from deck mud is cheaper but requires skill to slope correctly toward the drain. The shower pan must be waterproofed with a membrane that extends up the walls at least six inches. The pan membrane and the wall waterproofing must overlap so there is no gap for water to penetrate. This is the most critical detail in the entire shower. A gap between the pan waterproofing and the wall waterproofing will leak, and the leak will destroy the subfloor and framing.
Layout Planning
Do not start setting tile until you have planned the layout. The layout determines how the tile is positioned on the wall relative to the corners, the ceiling, the floor, the valve, the showerhead, and any niches or benches. A planned layout looks intentional. An unplanned layout looks like you started in one corner and let the tile fall where it may.
Find the center of each wall. Lay out a row of tile on the floor with spacers between them. Measure the total width and compare it to the wall width. The cut tiles at each end should be equal in size. If the wall is 60 inches wide and your tile with spacers covers 58 inches, you have 2 inches of cut tile to distribute. Put 1 inch of cut tile at each end, not 2 inches at one end and a full tile at the other. Symmetrical cuts look intentional. Asymmetrical cuts look like a mistake.
Start tiling from the second row up, not from the floor. Set a ledger board, which is a straight piece of wood screwed into the wall at the height of the second row of tile. Tile upward from the ledger board. After the tile above the ledger has set, remove the ledger, fill the screw holes with waterproofing, and tile the bottom row. The bottom row is cut to fit the specific contour of the shower pan or tub. Starting from the bottom means every small irregularity in the pan or tub rim cascades upward through the tile layout. Starting from a level ledger board means the visible tile field is perfectly level.
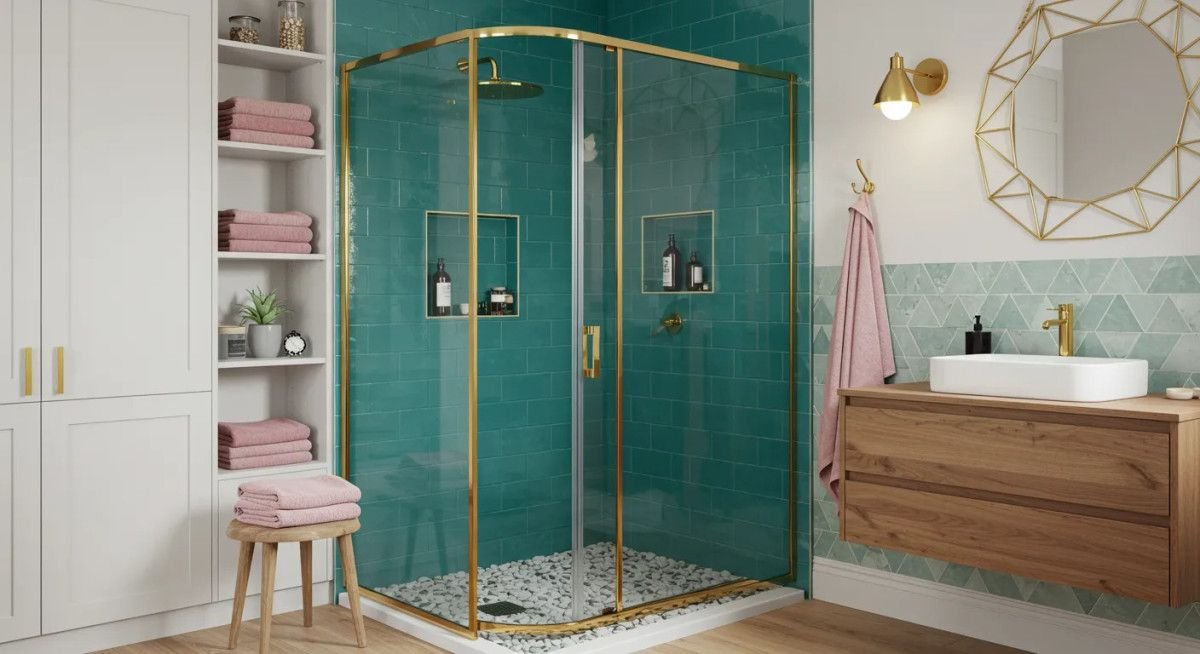
Plan the niche placement so it falls within a full tile, not across a grout joint if possible. A niche that aligns with the tile boundaries looks built-in. A niche that cuts across tiles looks like an afterthought. Install the niche framing and waterproofing before you begin tiling.
Setting the Tile
Mix the thinset according to the package instructions. The consistency should be similar to peanut butter: it holds its shape on the trowel but spreads smoothly. Mix only as much as you can use within two hours. Thinset that begins to set in the bucket cannot be revived by adding water. Discard it and mix a fresh batch.
Spread thinset on the wall with the flat side of the trowel, pressing it into the surface to achieve good contact. Then comb the thinset with the notched side, holding the trowel at a 45-degree angle. Comb in one direction, typically horizontally. Place the tile onto the combed thinset and press it firmly while sliding it slightly perpendicular to the comb direction. This collapses the ridges and ensures full coverage. Do not just press the tile straight in. The sliding motion is essential for eliminating air pockets behind the tile.
Check for full coverage periodically by lifting a tile you have just set. At least 80 percent of the back of the tile should be covered with thinset, and 95 percent in wet areas. If you see bare spots, your thinset is too dry, your notches are too small, or you are not pressing firmly enough. Adjust your technique.
Use spacers to maintain consistent grout joints. Check the tile alignment with a level every few rows. A small error in the first row becomes a large error by the time you reach the ceiling. Correct misaligned tiles immediately while the thinset is still workable. Once the thinset sets, the tile is locked in place, and correcting it requires breaking the tile and scraping the thinset off the wall.
Cut tile as needed for the edges, corners, and around the valve and showerhead. A wet saw makes clean, accurate cuts. For circular cuts around the showerhead pipe, use a diamond hole saw or make a series of straight cuts with the wet saw and break out the waste material. The escutcheon plate covers the cut edge, so the cut does not need to be perfectly smooth, but it must fit within the diameter of the plate.
Let the thinset cure for 24 hours before grouting. Do not rush this. Thinset that has not fully cured will absorb water from the grout and weaken.
Grouting and Sealing
Remove the spacers. Mix the grout according to the package instructions. Spread the grout across the tile surface with a grout float held at a 45-degree angle. Press the grout into the joints, working diagonally across the tile to avoid pulling grout out of the joints. Fill every joint completely.
Wait ten to fifteen minutes for the grout to begin firming up. Wipe the excess grout off the tile surface with a damp sponge, rinsing frequently. Wipe diagonally across the joints to avoid pulling grout out. Do not use excessive water. Water weakens the grout. After the grout has dried to a haze, typically 30 to 60 minutes later, buff the tile surface with a dry cloth or cheesecloth to remove the haze.
Let the grout cure for 72 hours before using the shower. The grout must be fully cured before it is exposed to water. After the grout has cured, apply a penetrating grout sealer according to the manufacturer’s instructions. The sealer does not waterproof the grout. It reduces staining and makes the grout easier to clean. Reapply the sealer annually.
Apply silicone caulk, not grout, at all changes of plane: the corners where walls meet, the joint where the wall tile meets the shower pan or tub, and around the valve escutcheon and showerhead. Grout in these locations will crack as the house settles and the materials expand and contract. Silicone caulk remains flexible and maintains a waterproof seal.
Common Mistakes That Ruin a Shower Tile Job
Inadequate waterproofing is the mistake that destroys the house. Tile and grout are the visible surface. The waterproofing layer behind them is what keeps the water out of the walls. Do not skip the waterproofing. Do not apply one coat when the manufacturer specifies two. Do not leave gaps at the seams. Water will find every gap.
Using mastic instead of thinset in a wet area. Mastic re-emulsifies when wet. It will soften, the tile will loosen, and the installation will fail. Use cement-based thinset everywhere in a shower.
Starting tile without a layout plan. Measure twice. Dry-lay the tile on the floor. Mark the centerlines on the wall. Set the ledger board. The extra hour spent on layout saves multiple hours of correcting misaligned tile and looking at an asymmetrical cut for the next twenty years.
Grouting the corners instead of caulking them. Grout cracks at changes of plane. Water enters the cracks and saturates the substrate. Use silicone caulk at every change of plane.
Grouting before the thinset has cured. Thinset needs 24 hours to cure before grouting. Grouting too soon introduces water into uncured thinset and weakens the bond.
When to Hire a Professional
If you have never tiled anything before, do not make a shower your first tile project. Practice on a kitchen backsplash, a laundry room floor, or a dry area where a mistake is cosmetic, not structural. Build the skills, then tackle the shower.
If the shower is the only bathroom in the house, hire a professional. A DIY shower that takes six weekends means six weekends without a functioning shower. A professional completes the job in one to two weeks.
If the existing shower has water damage that extends into the framing, hire a professional. Rotted studs and subfloor must be replaced before the shower can be rebuilt. This is construction work, not tile work.
The Short Version
Waterproof everything behind the tile. Use cement backer board or foam board with a waterproof membrane. Plan the layout before you mix thinset. Start tiling from a level ledger board on the second row. Mix thinset to peanut butter consistency. Press and slide each tile for full coverage. Let thinset cure 24 hours. Grout with sanded grout for joints over an eighth of an inch. Caulk the corners with silicone. Seal the grout after 72 hours. Do not use mastic. Do not skip waterproofing. Do not rush the curing times.
Shower tile is the most difficult tile project in a home. The materials cost $500 to $1,500. The labor, if you hire a professional, costs $3,000 to $8,000. The risk of doing it wrong is water damage that costs tens of thousands of dollars to repair. This is not a backsplash. Get the waterproofing right, and the tile will last for decades. Get it wrong, and you will be demolishing the shower you just built.